This project doesn’t require a lot of skill and can probably be completed in less than an hour.
It’s simple if you want to make your own sewn face mask. You don’t need more than scissors, a needle and thread. Easily done with the simplest of sewing kits!
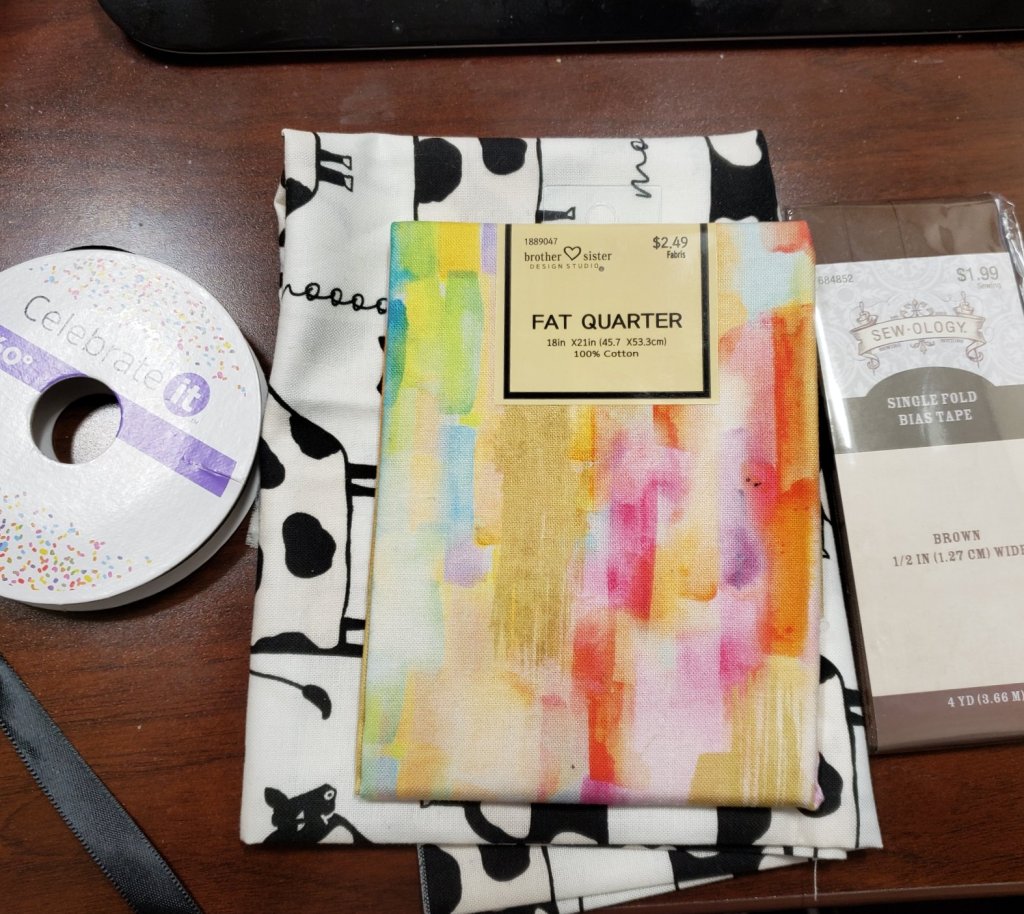
First, here’s the supplies you need. It isn’t much and you can get it at your local Walmart or craft store.
Fabric – this is as easy as buying what is called a Fat Quarter. It’s just a square of fabric and you can make two masks from one fat quarter. You could also get a small remnant from the fabric department of a store. They sell these odd pieces fairly cheaply.
Hem tape or craft ribbon – a lot of mask have elastic, but not necessary and it’s getting hard to find. You can buy hem tape or ribbon and it is cheap and works well.
Example of materials
First thing, you want to open the fat quarter and where it folds in half, cut it to create two pieces.
Cut fat quarter in half. It will make two masks.
With the print side down you can fold three edges in to create a more finished edge. You can iron it you want, or if you don’t have an iron handy you can press and rub along the fold until it holds.
I didn’t use an iron to make these folds. Just press and rub along the folds a few times and the fold will hold well enough to move to the next step.
Now, fold the fabric in thirds, with the unfinished edge inside.
This is the basic size of the mask. You might want to test the size to make sure it will cover your face well.
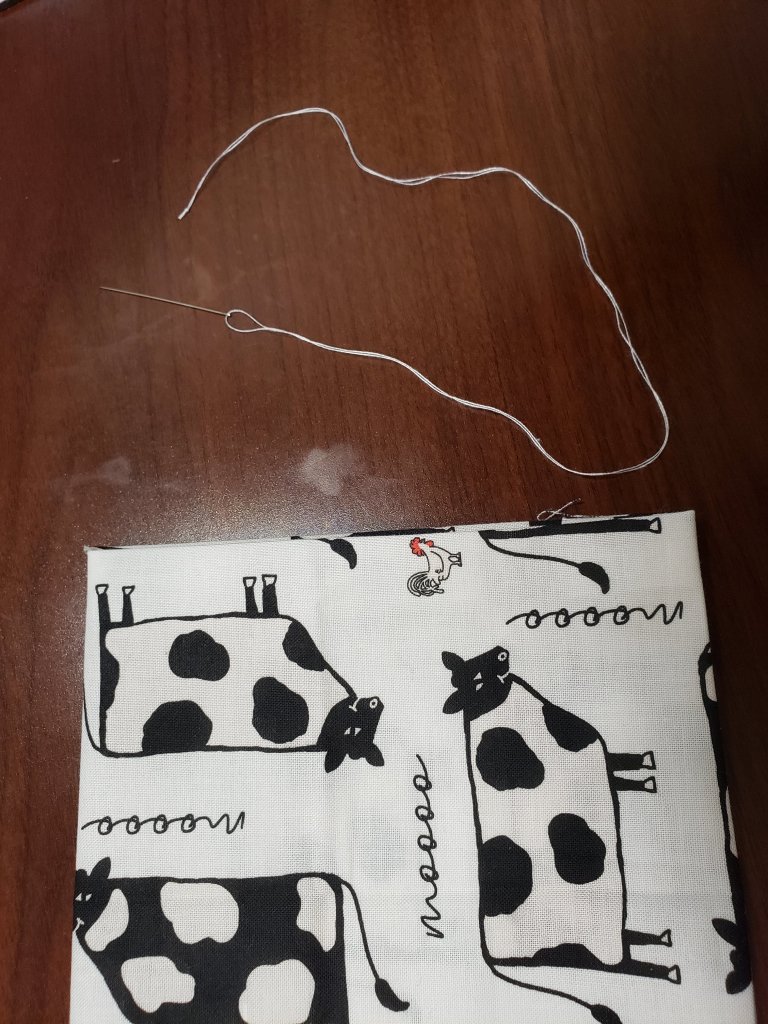
Now you’re ready to start sewing. I would suggest that you make your thread doubled about twice the length of the short side of your folded fabric. That gives you plenty of thread without making it so long that it tangles.
Make your thread when doubled about twice the length of the short side of the folded fabric.
Tie a knot at the end of your thread and cut off any long threads.
You can easily hide the knot by starting your sewing with the needle coming out from the inside of a fold.
Starting from inside a fold will help hide your knot.
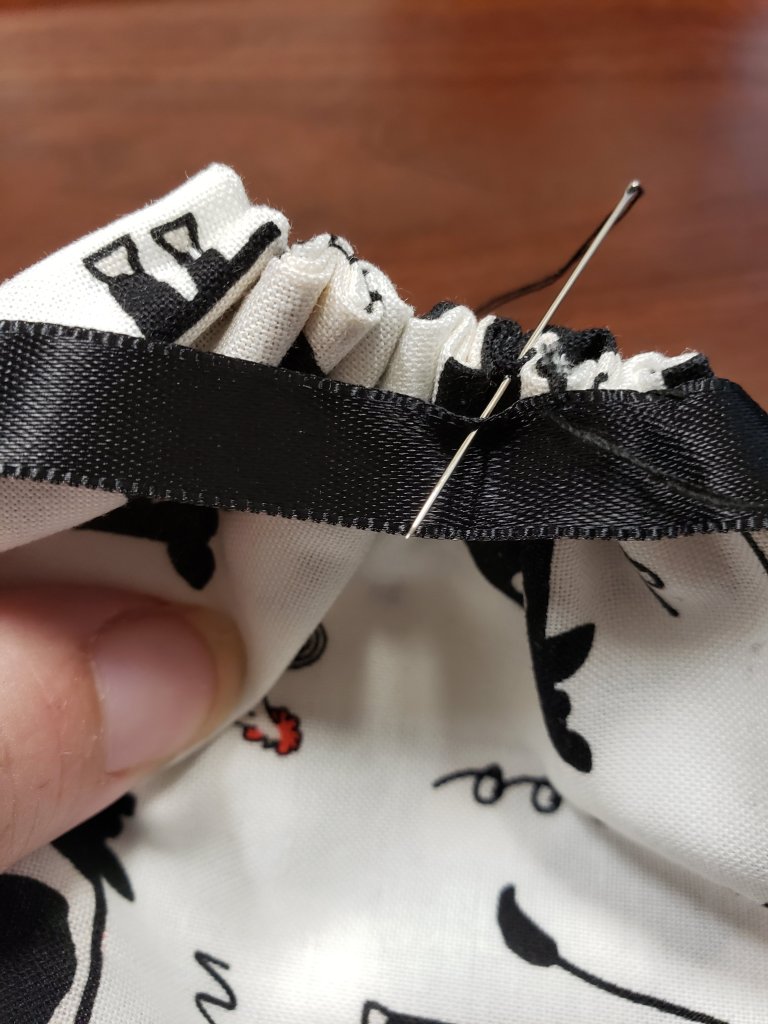
Now, you are going to make a simple long stitch, wher you will go through the fabric from one side all the way through all layers of fabric, then go back into the fabric about half a centimeter down, coming back up on the side you started. You don’t have to pull your needle all the way through every time, you can have several stitches on the needle as you go and pull it completely through every few stitches.
Make long stitches along the short side of the folded fabric.
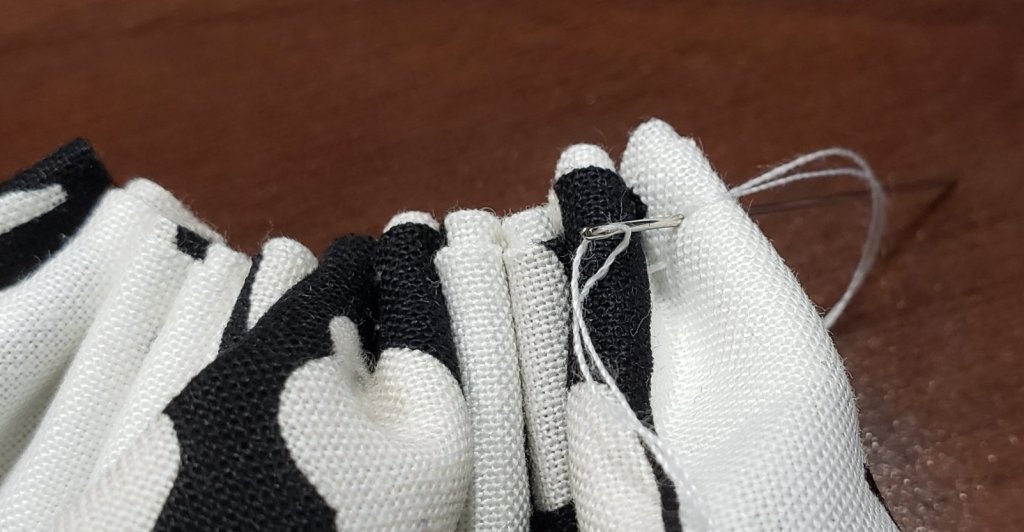
Once you have your stitches down the length of the fabric, you are going to start pulling the thread and pushing down the fabric to create gathers in the fabric. A couple of stitches at the end of your gathers will help hold the gathers while you tie off the thread.
Create gathers by pulling the thread and pushing the fabric down snugly.Side view of the gathers.Repeat gathers on both short ends.
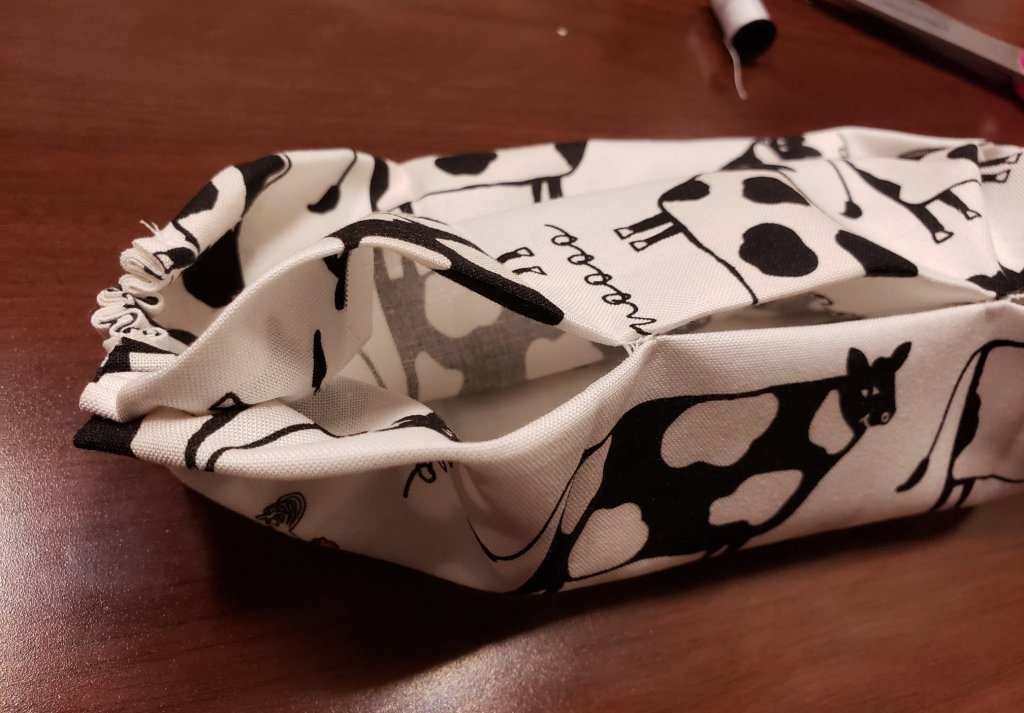
Now on the long side that has two folds, you don’t have to close completed. You can create two tracks of just a couple stitches about a third of the way down from both sides. This will be enough to hold the side closed, but also leave it open if you want to add additional layers of barrier. Some people add coffee filter paper between the layers because it has smaller weave for particles to pass through. By not completely closing this side it leaves that as an option.
By not completely closing the long end, you have the option of adding coffee filter paper or other additional layers, if needed.
Now you want to attach the ties. First, find out how long you need to cut the ties. I usually do about 24 inches long, but if it is your first mask, you might want to start with 36 inches. You can always cut smaller if they end up too long.
Align the middle of the length of the tie to the start of your mask. You might want to match your thread to the tie so that it doesn’t show.
Now, start inside the fold of the first gather, you can bring your needle up and catch just the edge of your tie. Then take needle and pull the thread all the way through. Then at the next fold of the gather, take the needle through from the bottom up and through the edge of the tie. By moving from fold to fold of the gather, it keeps your stitches pretty uniform.
Use the folds to help keep your stitches neat.Sew the other side of the tie, again using the folds to space your stitches.
Tie off your thread and you have one side complete.
Repeat on the second side and you are pretty much done.
With ribbon, it’s easy to tie so that it slips over your ears, if you don’t want to tie every time.
Just tie a simple knot in the ribbon to slip over your ears if you don’t wish to tie every time.
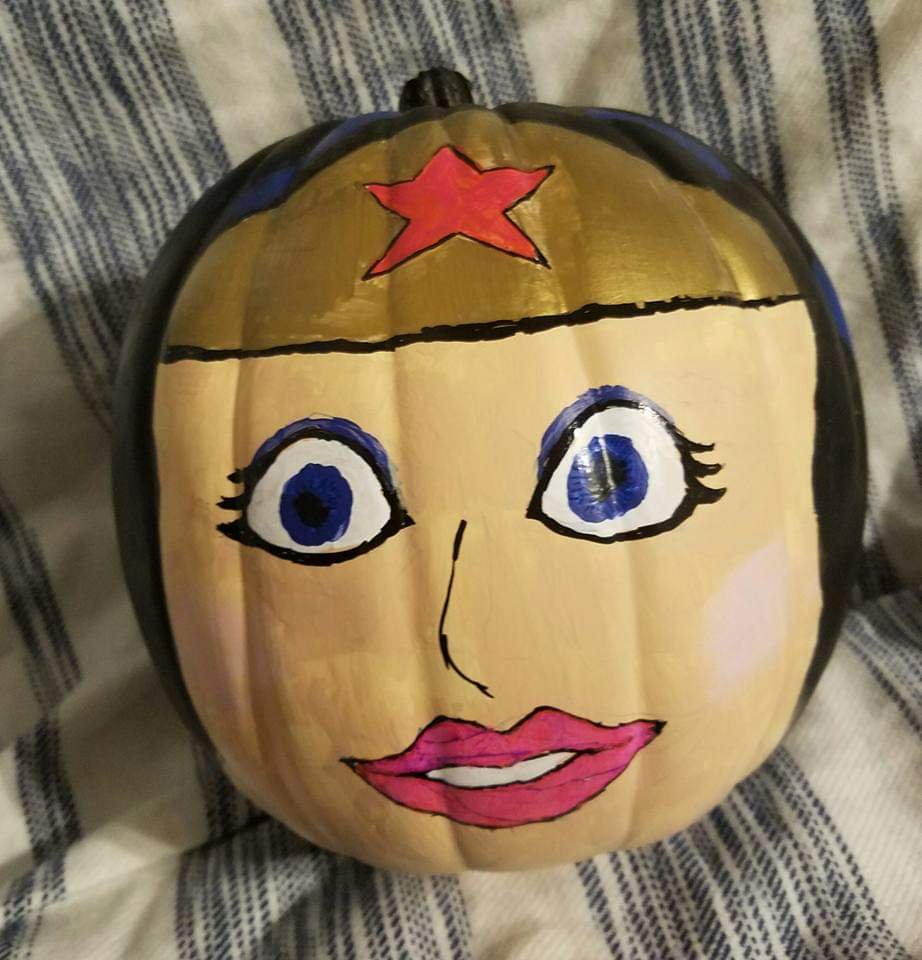
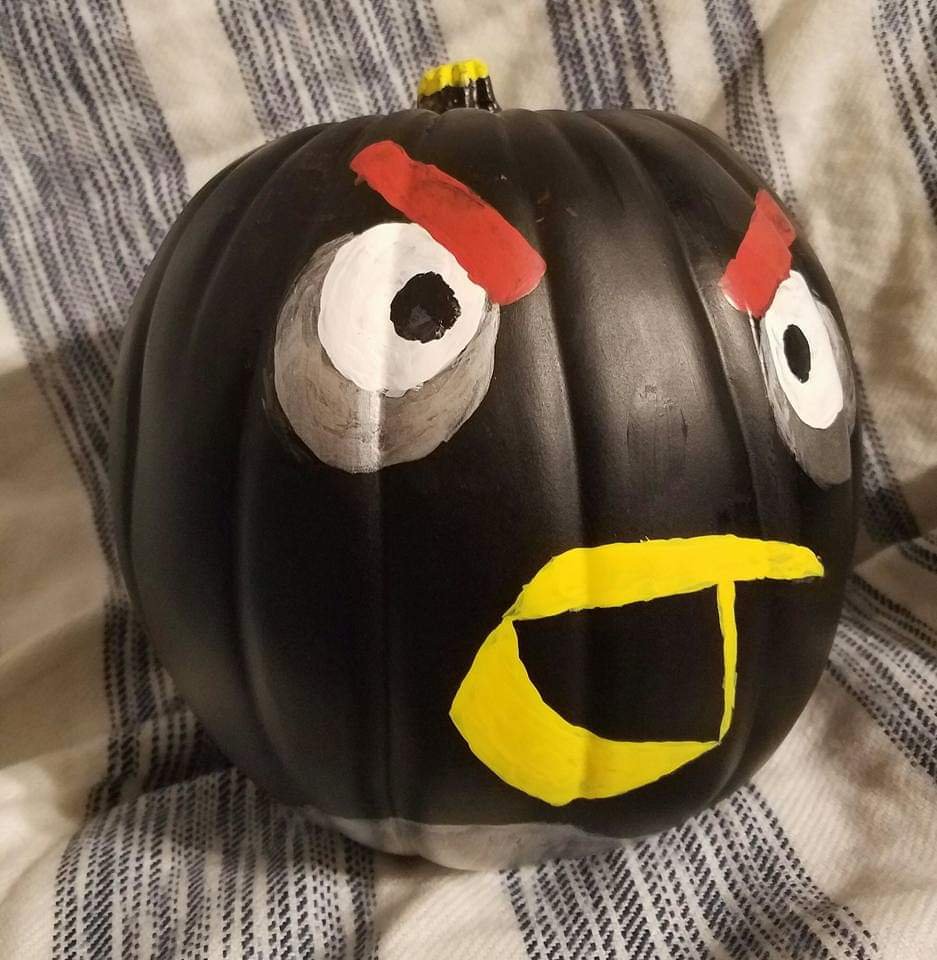
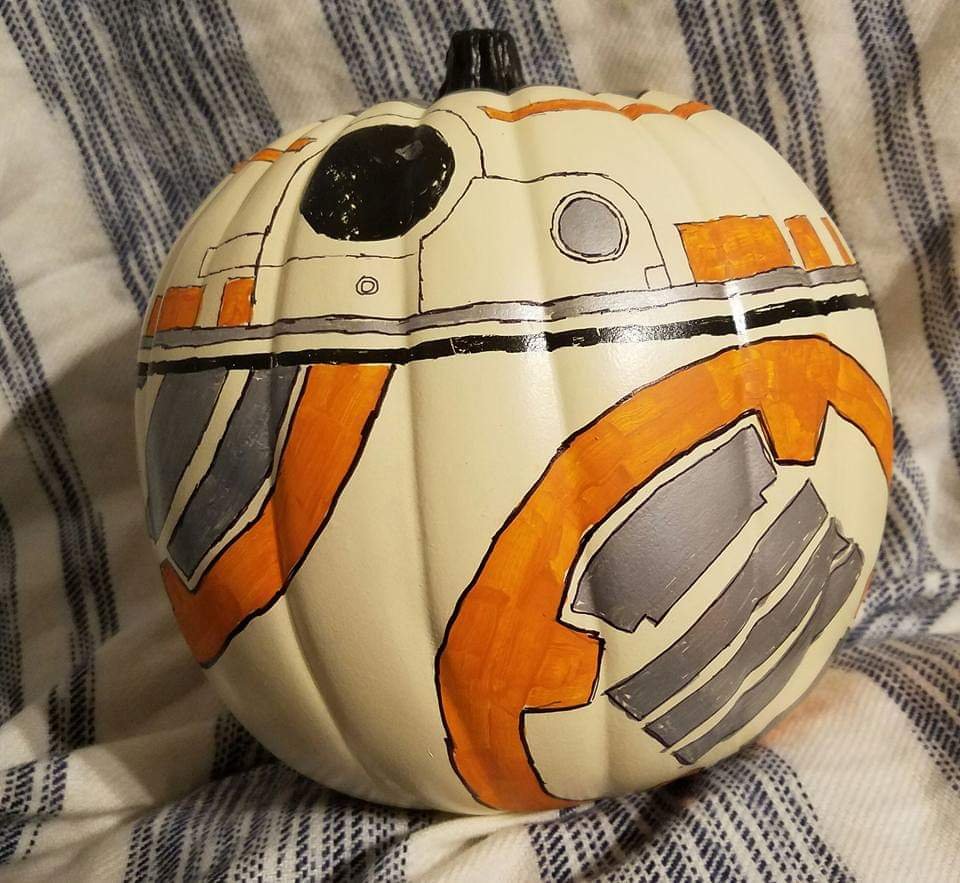
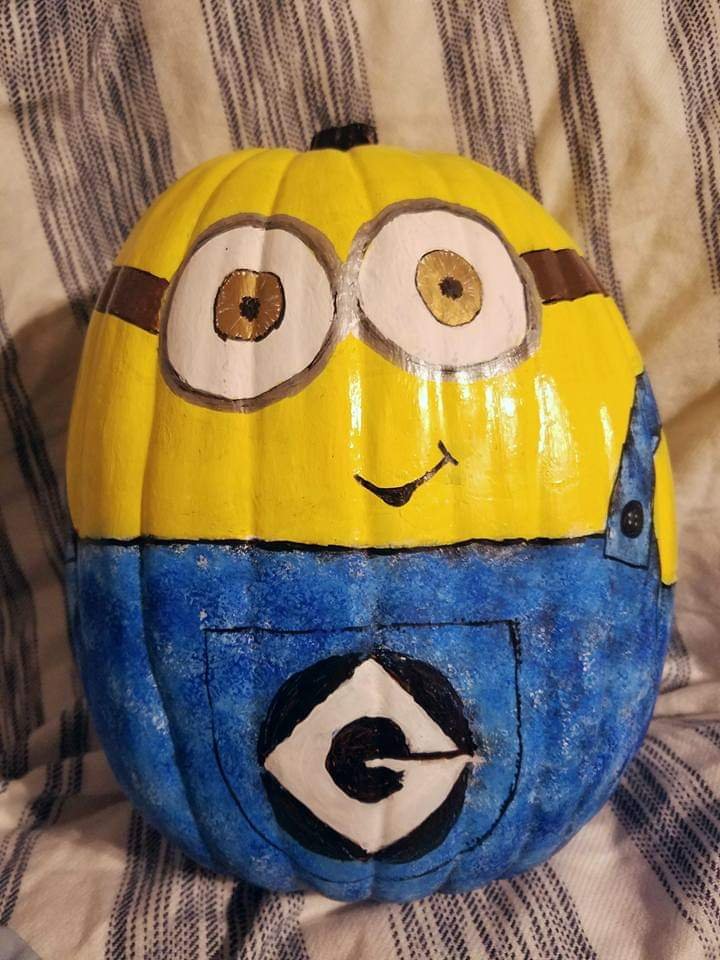
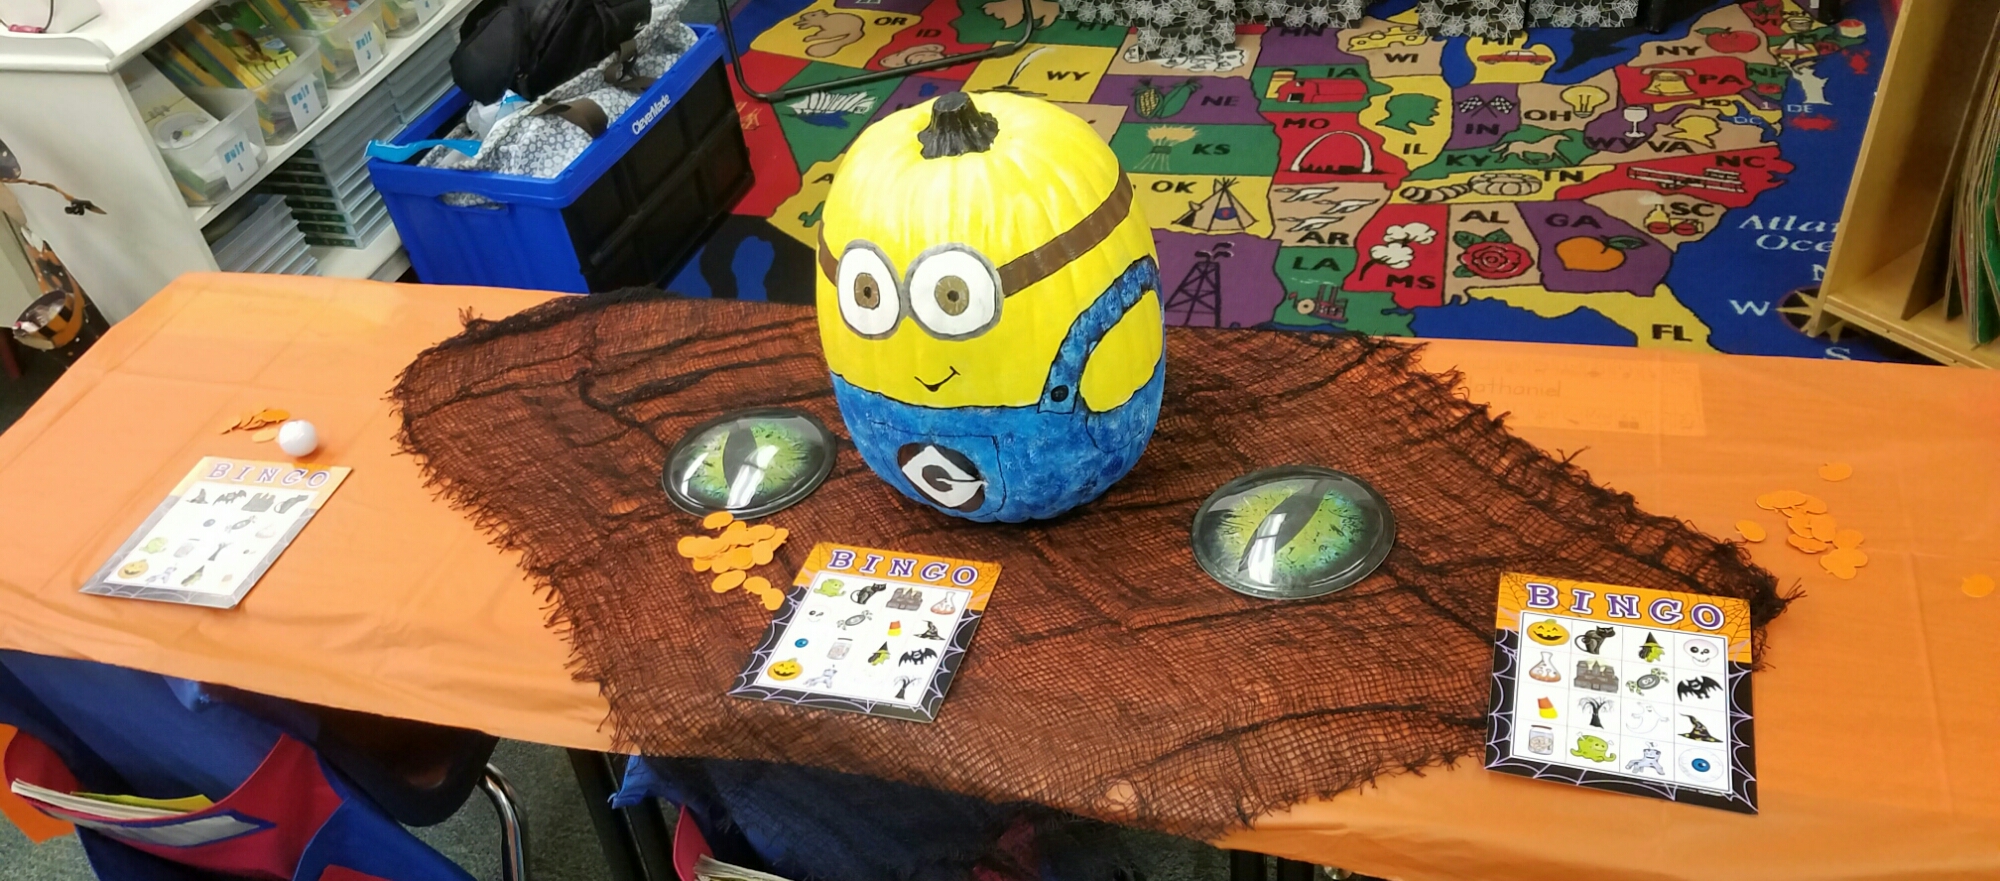
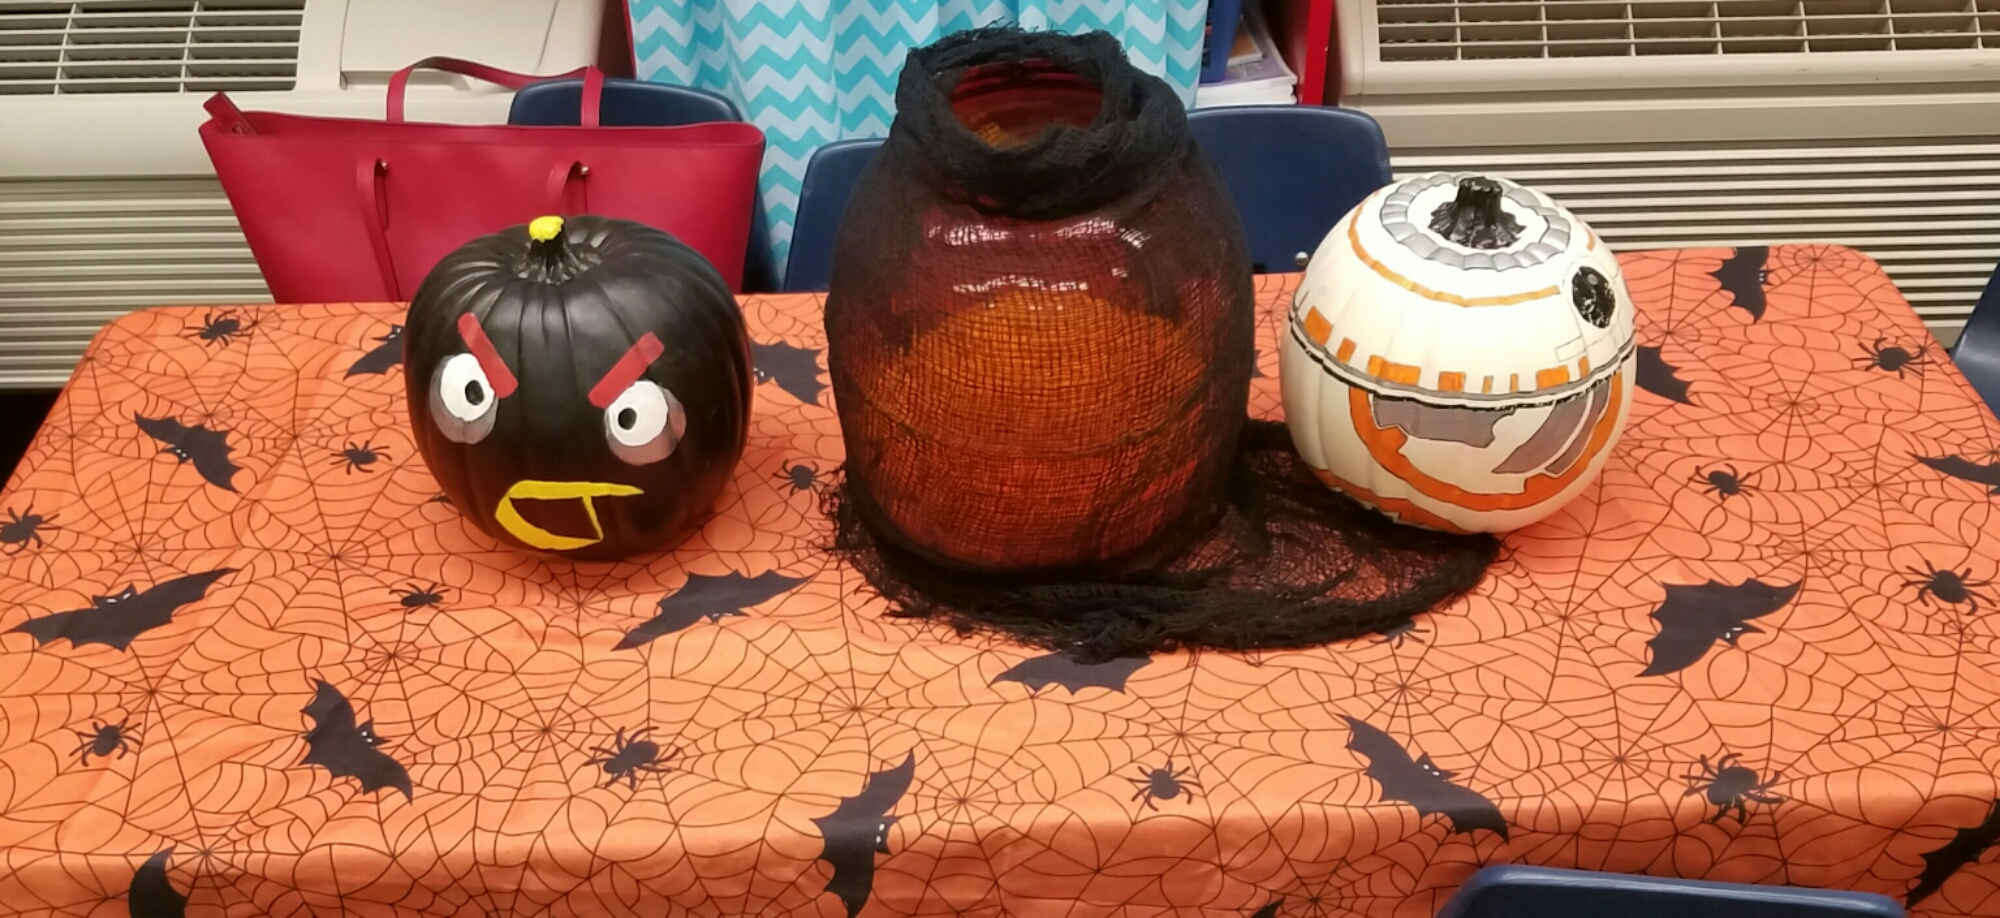
So for the past couple of years, I started decorating/painting craft pumpkins as different characters from movies and shows that we enjoy. As I sit here contemplating starting my first addition for this Halloween season, I thought I’d share a sampling of past year’s projects.
These are always fun little projects. Now who to paint next…
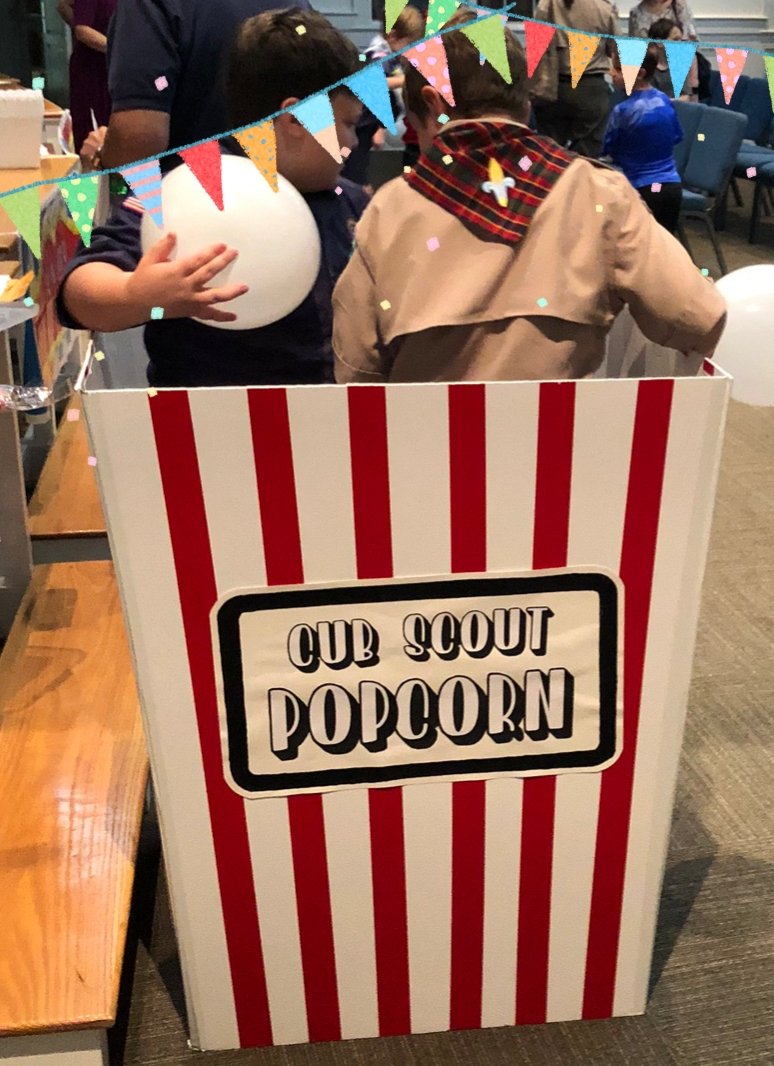
So, it’s that time of the year that kids start back to school and fundraisers abound.
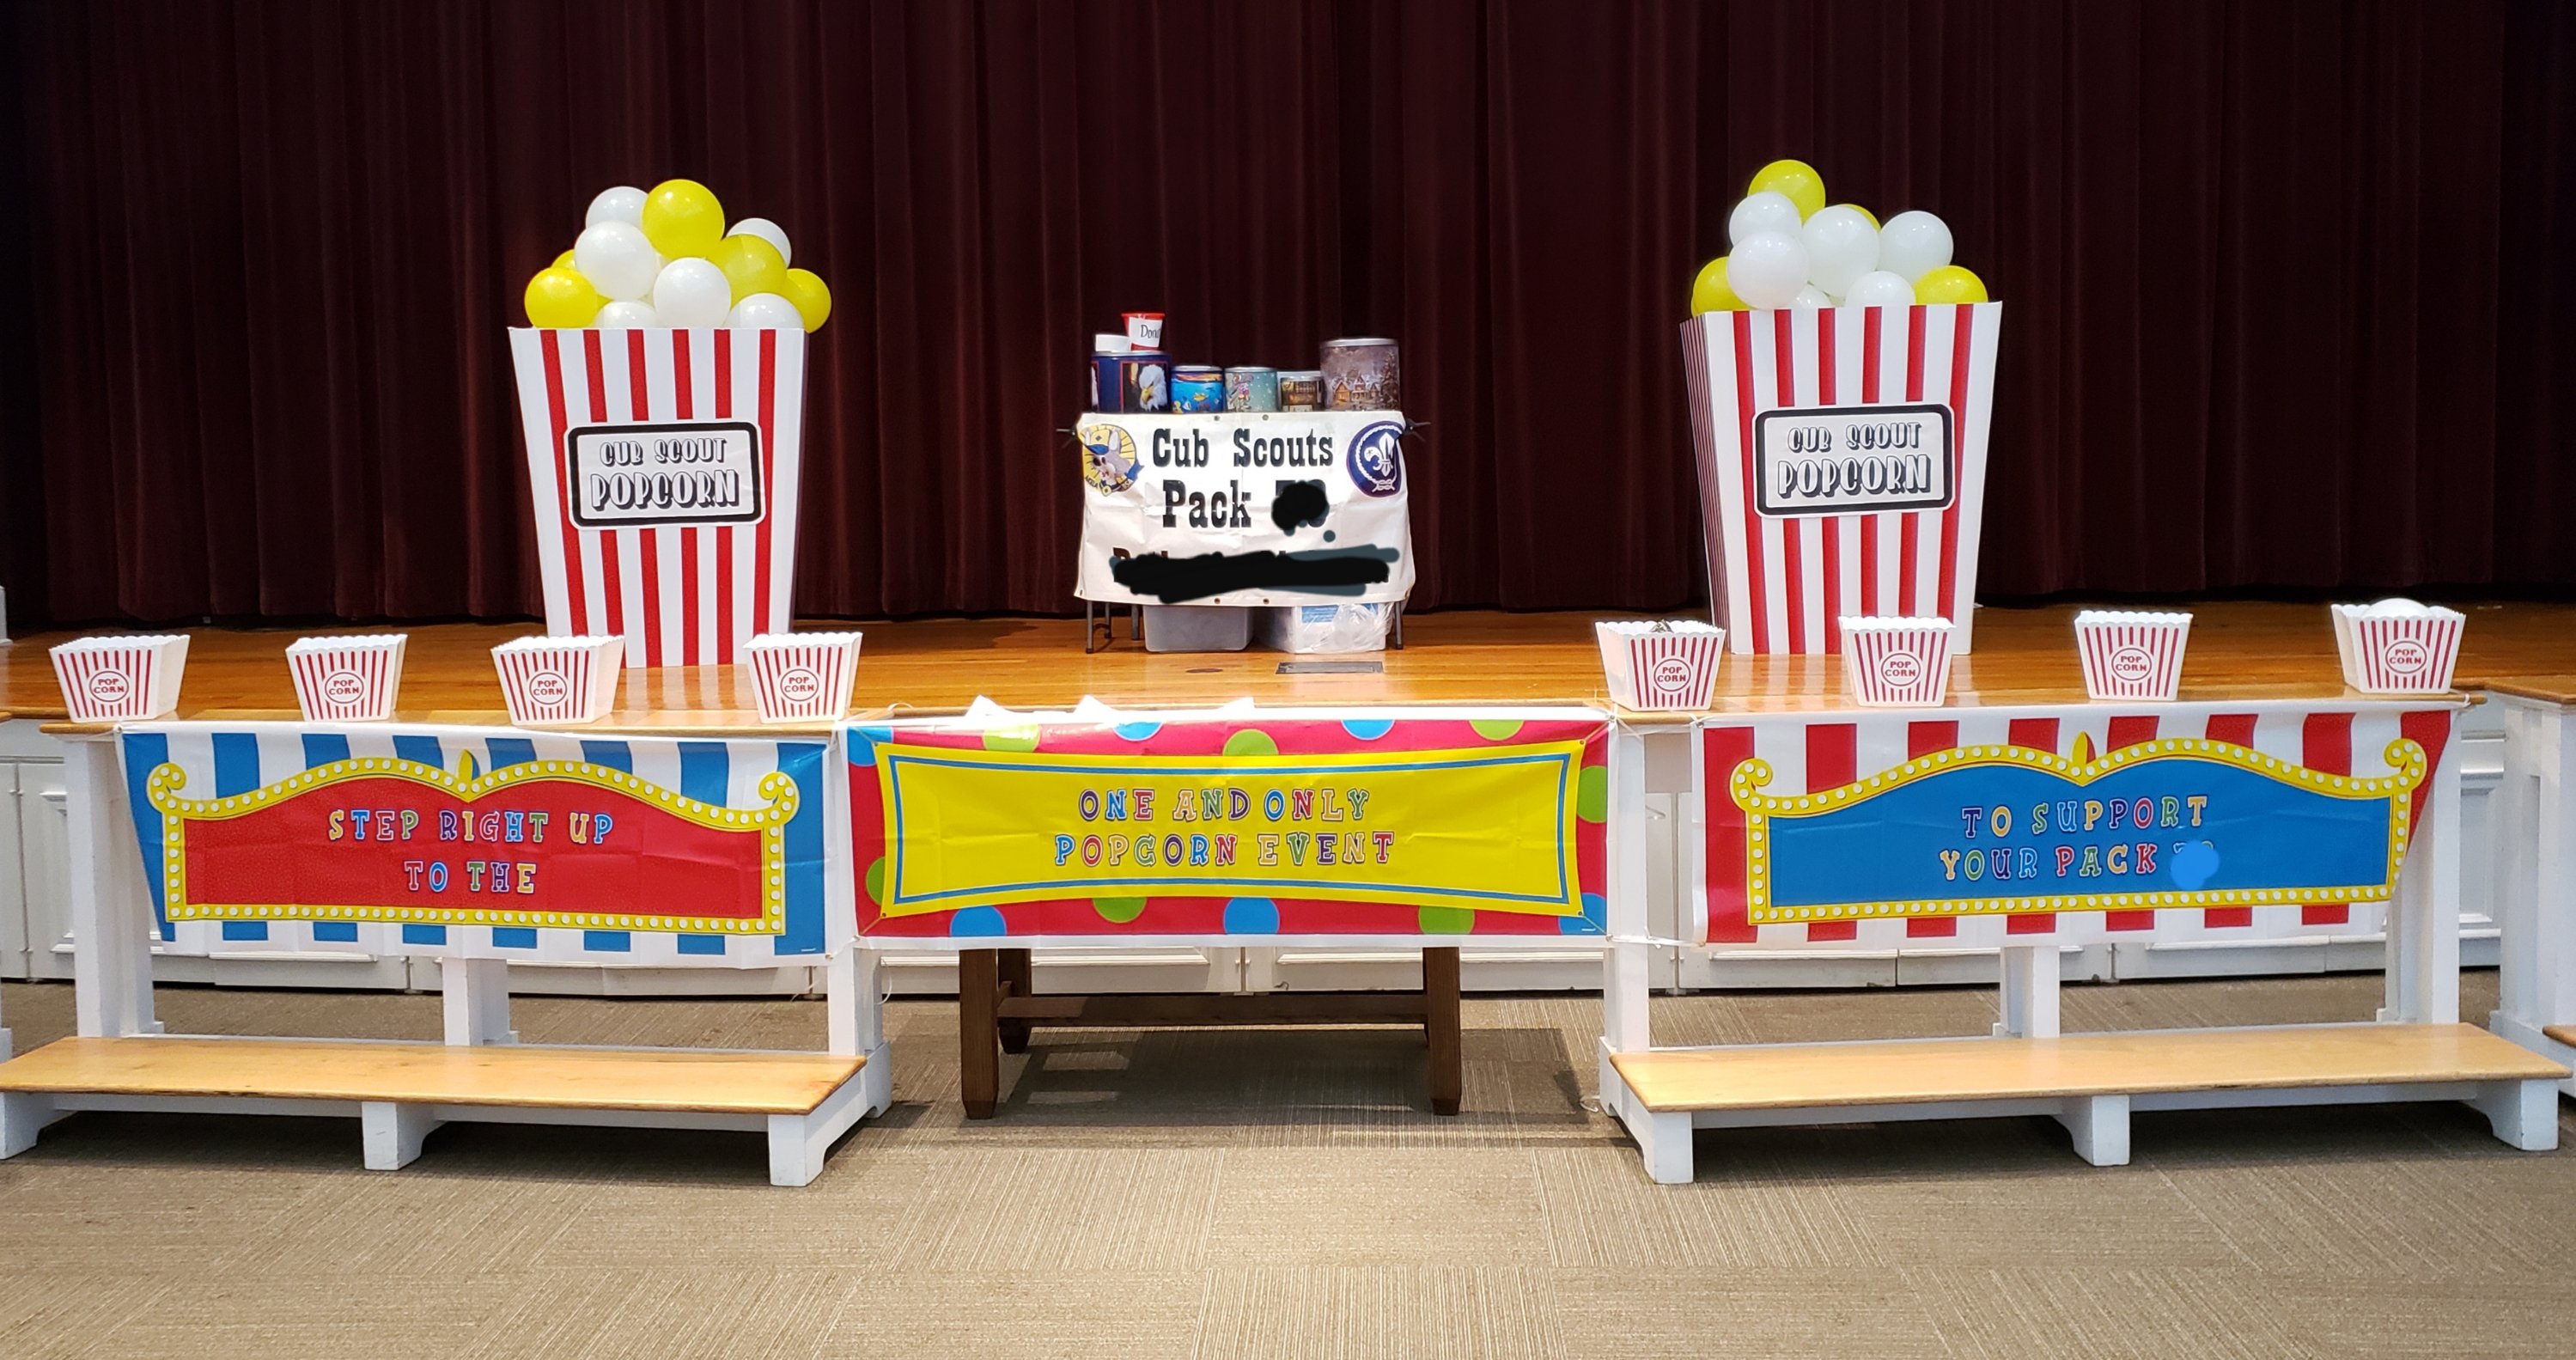
My son is in the Cub Scouts and they have one and only one fundraiser for the year. They sell popcorn.
Because it is their only fundraiser, they always have a big kickoff at the pack meeting. This year I volunteered to take part in the event, working on decorations.
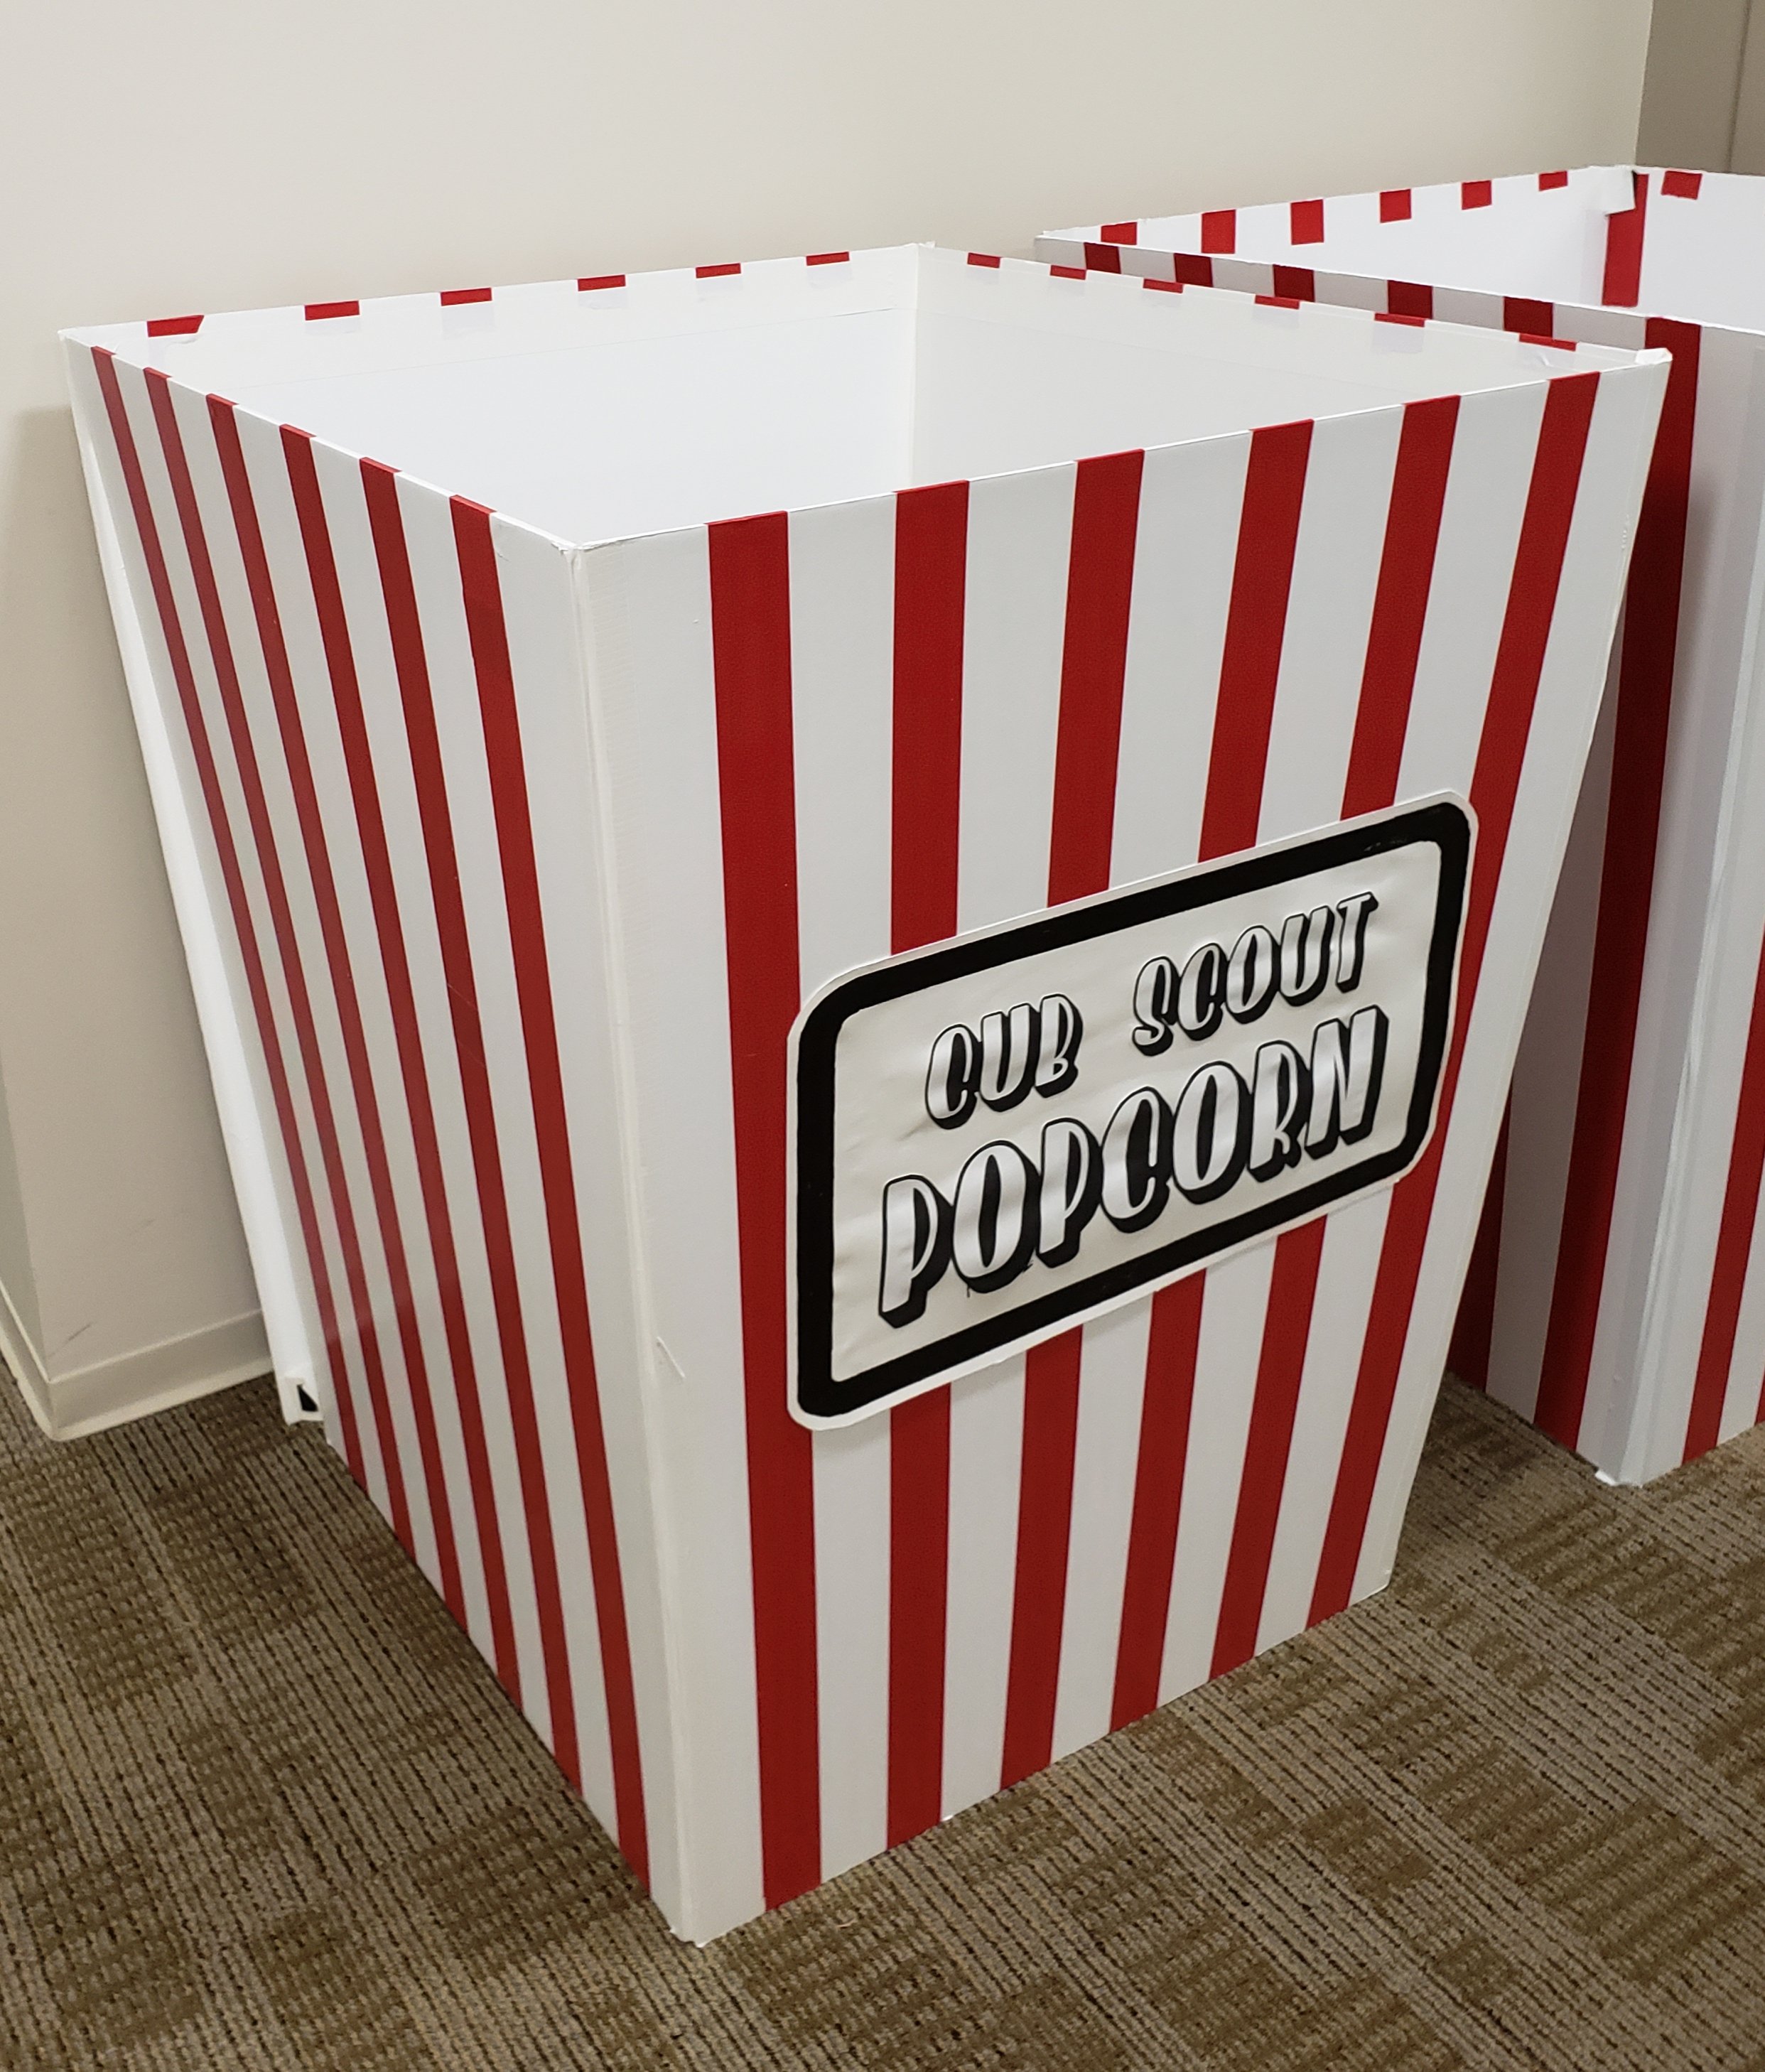
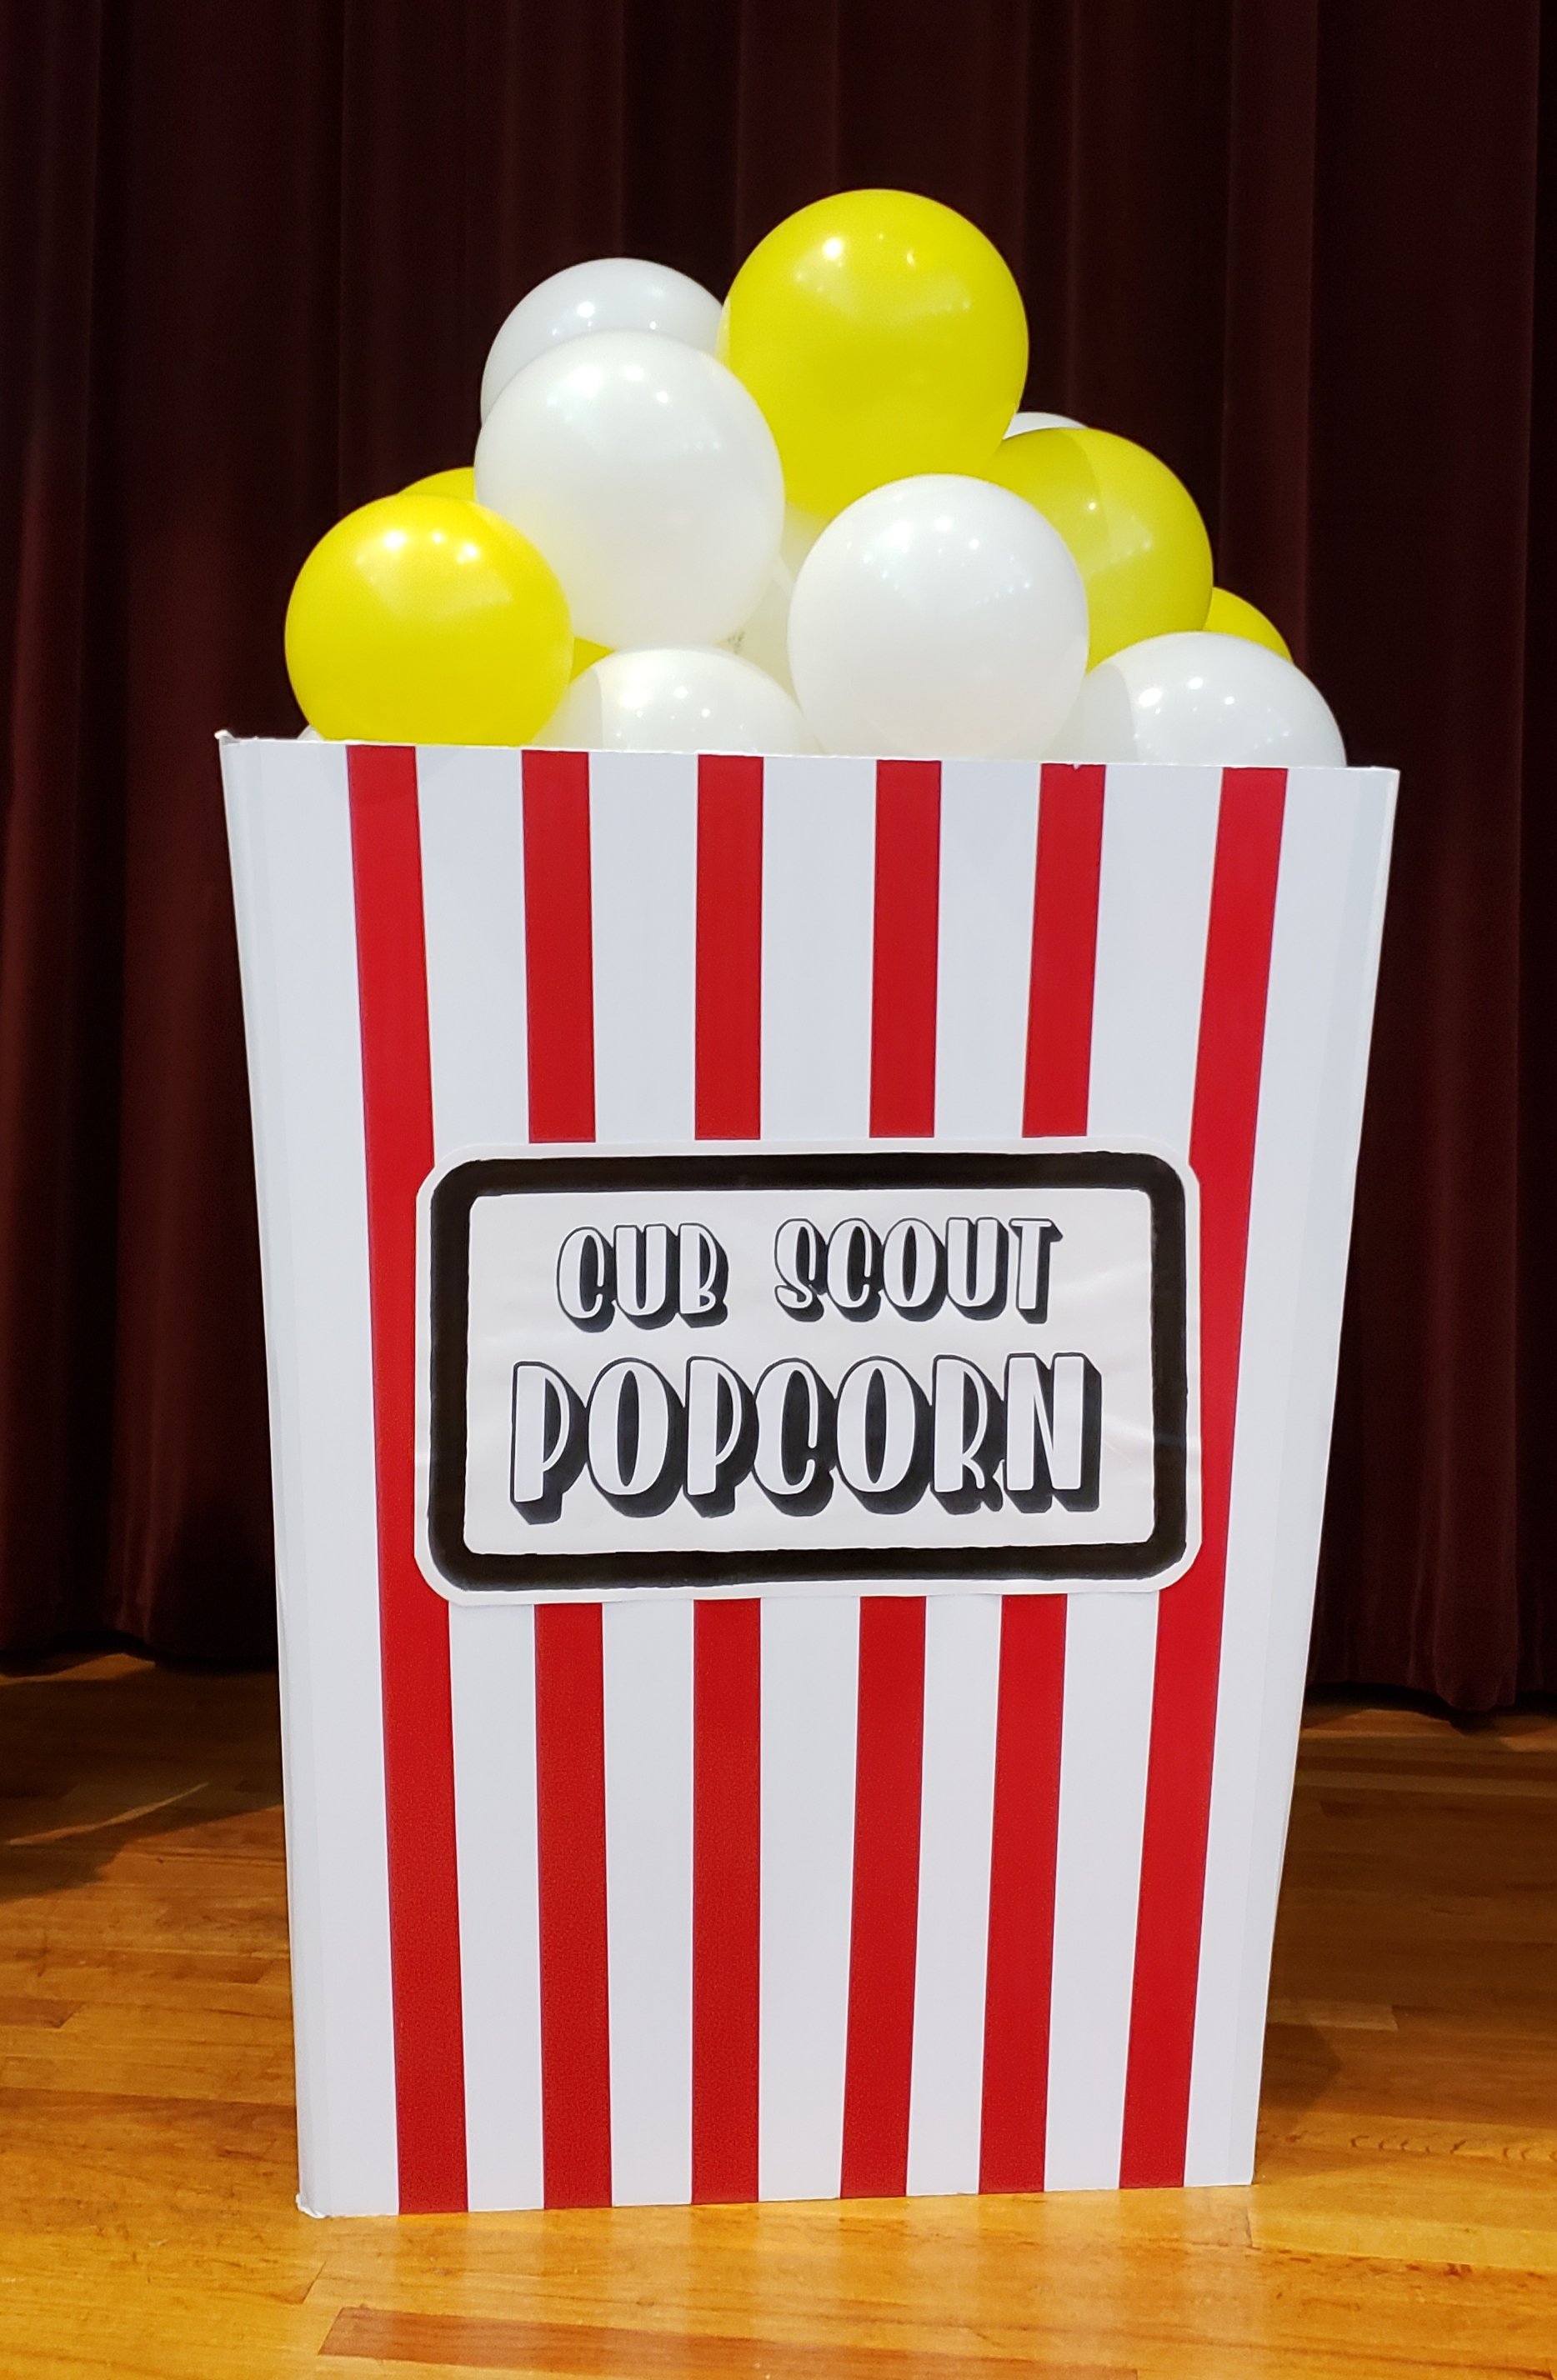
I decided to make a couple giant popcorn boxes that we could fill with yellow and white balloons. I wanted to make something that could possibly be reused in future kickoff meetings, so I decided foam board (foam core) as the medium.
My thought was to do a traditional white box decorated with red stripes. Then decorate with writing on the front to say popcorn. I wanted a tapered shape, with a slightly smaller bottom than the top.
Although there are several ways to create the stripe, I decided that the easiest and fastest would be to use colored tape. Marker or paint might have been more cost effective, however I was worried about getting a crisp stripe edge and chose colored duct tape for that reason.
List of items needed for project (to make one popcorn box):
4 boards – foam core – 32″ x 40″ ($5.99 each at Hobby Lobby)
2 rolls – red Duck Tape – 1.88″ wide ($3.99 each at Hobby Lobby)
1 roll – white Duck Tape – 1.88″ wide ($3.99 each at Hobby Lobby)
razor knife blade and scissors
ruler
pencil
strip of adhesive velcro
Optional items
painter’s tape or easy release masking tape
2 sheets – poster board – 22″ x 28″
white paper or cardstock (to print on)
Glue stick or school glue
Starting the project: Creating the tapered shape.
First step in creating these boxes was to shape the foam boards. After considering the shape, I decided to taper each side by 3 inches. With one board laid out, I measured 3 inches from the side of each of one 32″ end of the board. A long straight edge could have been used to draw a cutting line from the top corner of one end to the 3″ tapered mark on the other end. After trying a couple different, it seemed that the easiest way for me to mark the cutting line was to use masking tape or painter’s tape. (If you try this, be sure to test a small piece to make sure that removing the tape won’t damage your board.) After cutting both sides, you now have a trapezoidal shape retaining the 40″ length and the top remains 32″ wide and the bottom end is now 26″ wide.
Calculating Stripe Placement
To calculate the placement of the stripes, I decided to easily begin on the bottom end and mark off 2″ intervals across the bottom end. This let me have an odd number number of 2″ stripes so that I could start and end with the same color. The pattern would be W-R-W-R-W-R-W-R-W-R-W-R-W.
Note: Even though the duct tape is technically 1.88″ wide, I based all of my calculations on an even 2″ because the difference in size was negligible.
At the top, the spacing is going to alter because the red stripe will stay calculated at 2″, but the white will widen slightly. So, with 32″, we subtract 12″ for the width of 6 2″ striped. Now, we need to divide the remaining 20″ into 7 white stripes. This means that the striped, evenly spaced would need to be 2.85″ wide. That’s not easy to picture on a ruler, at least not to me, so I will try to describe it into what you might see on a ruler with 1/8 and 1/16 marks. If your ruler has 1/8th measures between inches, your mark will go between the 6/8 and 7/8 marks. If your ruler is more precise, with 1/16 markings, your measure is between 13/16 and 14/16. This pattern is going to be 2.85″ – 2″ – 2.85″ – 2″ – 2.85″ – 2″ – 2.85″ – 2″ – 2.85″ – 2″ – 2.85″ – 2″ – 2.85″.
Quick tip: While you can measure each board precisely, I found it easiest to mark out one board, then apply the red tape stripes. Set that board atop the other tapered foam boards and then it is very easy to mark the lines for the remaining three boards at once without the ruler.
Placing the Red Stripes
Now you are ready to place the red tape stripes on the board. If you prefer to measure your tape before cutting, then you would want to measure about 42″ for each so that the stripe can wrap around the ends of the board. Personally, I did not measure. I pulled out a length of tape and held it over the board to make sure it was long enough and then cut. Line up the edge of the tape to your markings and apply the tape. Continue to add all the stripes.
Now repeat above steps on the other three boards.
Quick tip: The tape is a long sticky strip and can easily get tangled, so it might help to have a second person cut and maybe help place the tape.
Connecting the Box Sides
Now that you have four identical boards with stripes applied, we can start connecting the sides together. Place two boards atop each other with the stripes to the outside. Line up the tapered edges. Measure out a length of white duck tape about as long as your red tape stripes were. Starting about 1/2″ from the outer edge of the foam board, I applied the white duct tape, then wrapped it around both boards to cover about 1/2″ on the other foam board, creating a joint. Opening the boards where both lay flat, fold over any excess at the top and bottom. Then, add duct tape over the inner fold. There will be a slight gap between the boards, that is fine. It will make the fold occur much easier.
Now, fold those back to to original configuration where the red stripes are facing outward. Place a third foam board on top of the stack, this time, with the red stripes face down toward the red stripes of one of the other boards. Apply the white tape to this joint as well. Then reverse the fold (make sure you don’t fold over the first board or your join might not be smooth). Cover this joint with white duct tape as well.
Add the last board by following the same process and make sure all the sides with the stripes are facing the same direction when unfolded.
Use the white duct tape to cover the raw edges on the two ends. Don’t join these two ends, because we are going to use the velcro to connect these ends. This will let it close more easily for storage. Also, you can use the white tape along the top of the inside of the board to give a more finished look by covering any uneven endings on the red stripes.
Use the white duct tape to create about a 2″ flap at the top and bottom of one side. Place one side of velcro on the flap and the other side on the inside of the other outer edge of the box.
Tip: Keep the velcro close to the edge of the join so that there is not a big gap.
Optional Features
So the basic box is complete. Now there are a few things you might want to do to improve the finished product.
Add a design
You can cut out a shape on a piece of posterboard (Dollar Tree – 2 sheets for $1). Then print out “Popcorn” or whatever you want to decorate your box with on a cardstock or heavy paper that you can cut out and glue to the side of the box.
Tip: Use a site like fonts.google.com to find a fun font to use for your decorations.
Create a shelf to hold balloons
You probably don’t want to have to completely fill the box with balloons, so an easy answer is to create something that you can put your balloons on higher up in the box.
I used posterboard, duct tape and velcro to create a “shelf” for the balloons. My posterboard was rectangular so I used duct tape to secure the shorter end to one interior side of the box. The other end did not reachieve completely across to the other side, so I used the duct tape and velcro to reach the additional inches.
To make this happen, I taped the start of a strip of tape near one corner of the poster board and cut off enough that was double the difference needed to reach the other board. I folded the tape over onto itself and trimmed any edges that didn’t align. Velcro connected the tape to the opposite side of the box. This was repeated on the other unattached corner of the posterboard. Because we used velcro, the box will fold flat to store and reuse again after the event.
Our decorations helped create a fun enviroment for a great kickoff!
My family has some leftovers from Thanksgiving that needed to be used. But what to make with them?? Left over Cranberry Sauce, lots of carrots (raw), fruit, etc. So I came up with my own recipe for using those special left over dinner items.
C * 3 – Cranberry Carrot Cake
2 cups of raw carrots grated
1 1/2 can of Cranberry Sauce
1 over ripe banana
2 eggs
1 1/2 cup Self Rising Flour
1/2 cup Oatmeal
1 cup Walnuts
1/4 cup raisins
1/4 cup dried cranberries
1 tsp. Vanilla Extract
1/2 tsp. Cinnamon
1/2 tsp. Nutmeg
1/2 stick butter (melted)
In a large bowl mash the banana and cranberry sauce until there are no lumps. Next, mix in the carrots, walnuts, raisins, cranberries, flour, oatmeal, eggs, vanilla, cinnamon, nutmeg, and butter. The mixture should be dense and wet but not soupy. Preheat your oven to 375 degrees. Spray your Bundt pan with cooking spray – be sure to get the sides and center coated. Cook for 1 hour. Let the cake rest for a couple minutes before placing it on a cooling rack.
This will be a very moist, dense cake/bread. I did not add any sugar to this recipe as the fruit should be sweet enough. Also, you can substitute apple sauce or Coconut oil for the butter, if you are looking for a vegan or alternative option.
This is good served for breakfast with a spot of butter and yogurt.
My husband and I had a ton of fun helping out with our son’s 1st grade Halloween party this morning. We brought decorations and I has a blast crafting some of these…
The painted craft pumpkins, I made with acrylic paint, permanent markers and paint pens on craft pumpkins. I plan to keep these to reuse at home and add to the collection next year!
The felt banners were craft kits that made cute runners.
Once you are done frying up your pork fries, spoon out or pour out any excessive oil, leaving enough to cover the bottom of the pan (and leave the bits that are stuck to the pan).
Pour in the flour mixture from flouring the strips. (Why waste good flour! And it is already seasoned!) Stir the flour into the oil, scraping those good crunchy bits from the pan. You can throw in some chopped onions at this point, if you like.
Cook the flour until you get a nice rich brown color. It will be pretty thick. Pour in about 2 cups of water about a 1/4 cup at a tine and start stirring or whisking. If you have any clumps or lumps, use a spoon to smash it and keep stirring until you don’t find any more flour clumping. At this point you can’t have too much water, but you can have too little. it should be pretty thin, ithe will thicken as the flour cooks and moisture evaporates. Keep stirring the gravy until you reach the desired consistency. You can always add more water if it gets too thick or cook it longer to thicken. Remember it will thicken as it cools.
Serve this luscious gravy over rice, potatoes, biscuits, anything… or just eat it with a spoon, we won’t judge!
I first had these at Logan’s Roadhouse restaurant. They were very thinly straps of fried pork loin. My very picky son even loved them. Unfortunately (at least at our local restaurant) they have changed their recipe and now have thick fingers of pork loin which isn’t quite the same, nor is it shareable as an appetizer. I have been disappointed in the change, but it did inspire me to try to make this at home.
Pork Fries
(This makes a pretty generous amount that can be served as an appetizer)
About 1 1/2 pound boneless pork loin (I purchased 2 boneless pork loin chops that has been butterflies that looked like about 4 pork chops 3/4in thick.)
3 heaping tablespoons flour
About 1/2 cup vegetable oil (or peanut oil, whatever your preference is for frying)
Salt, pepper, Lawry’s Season Salt
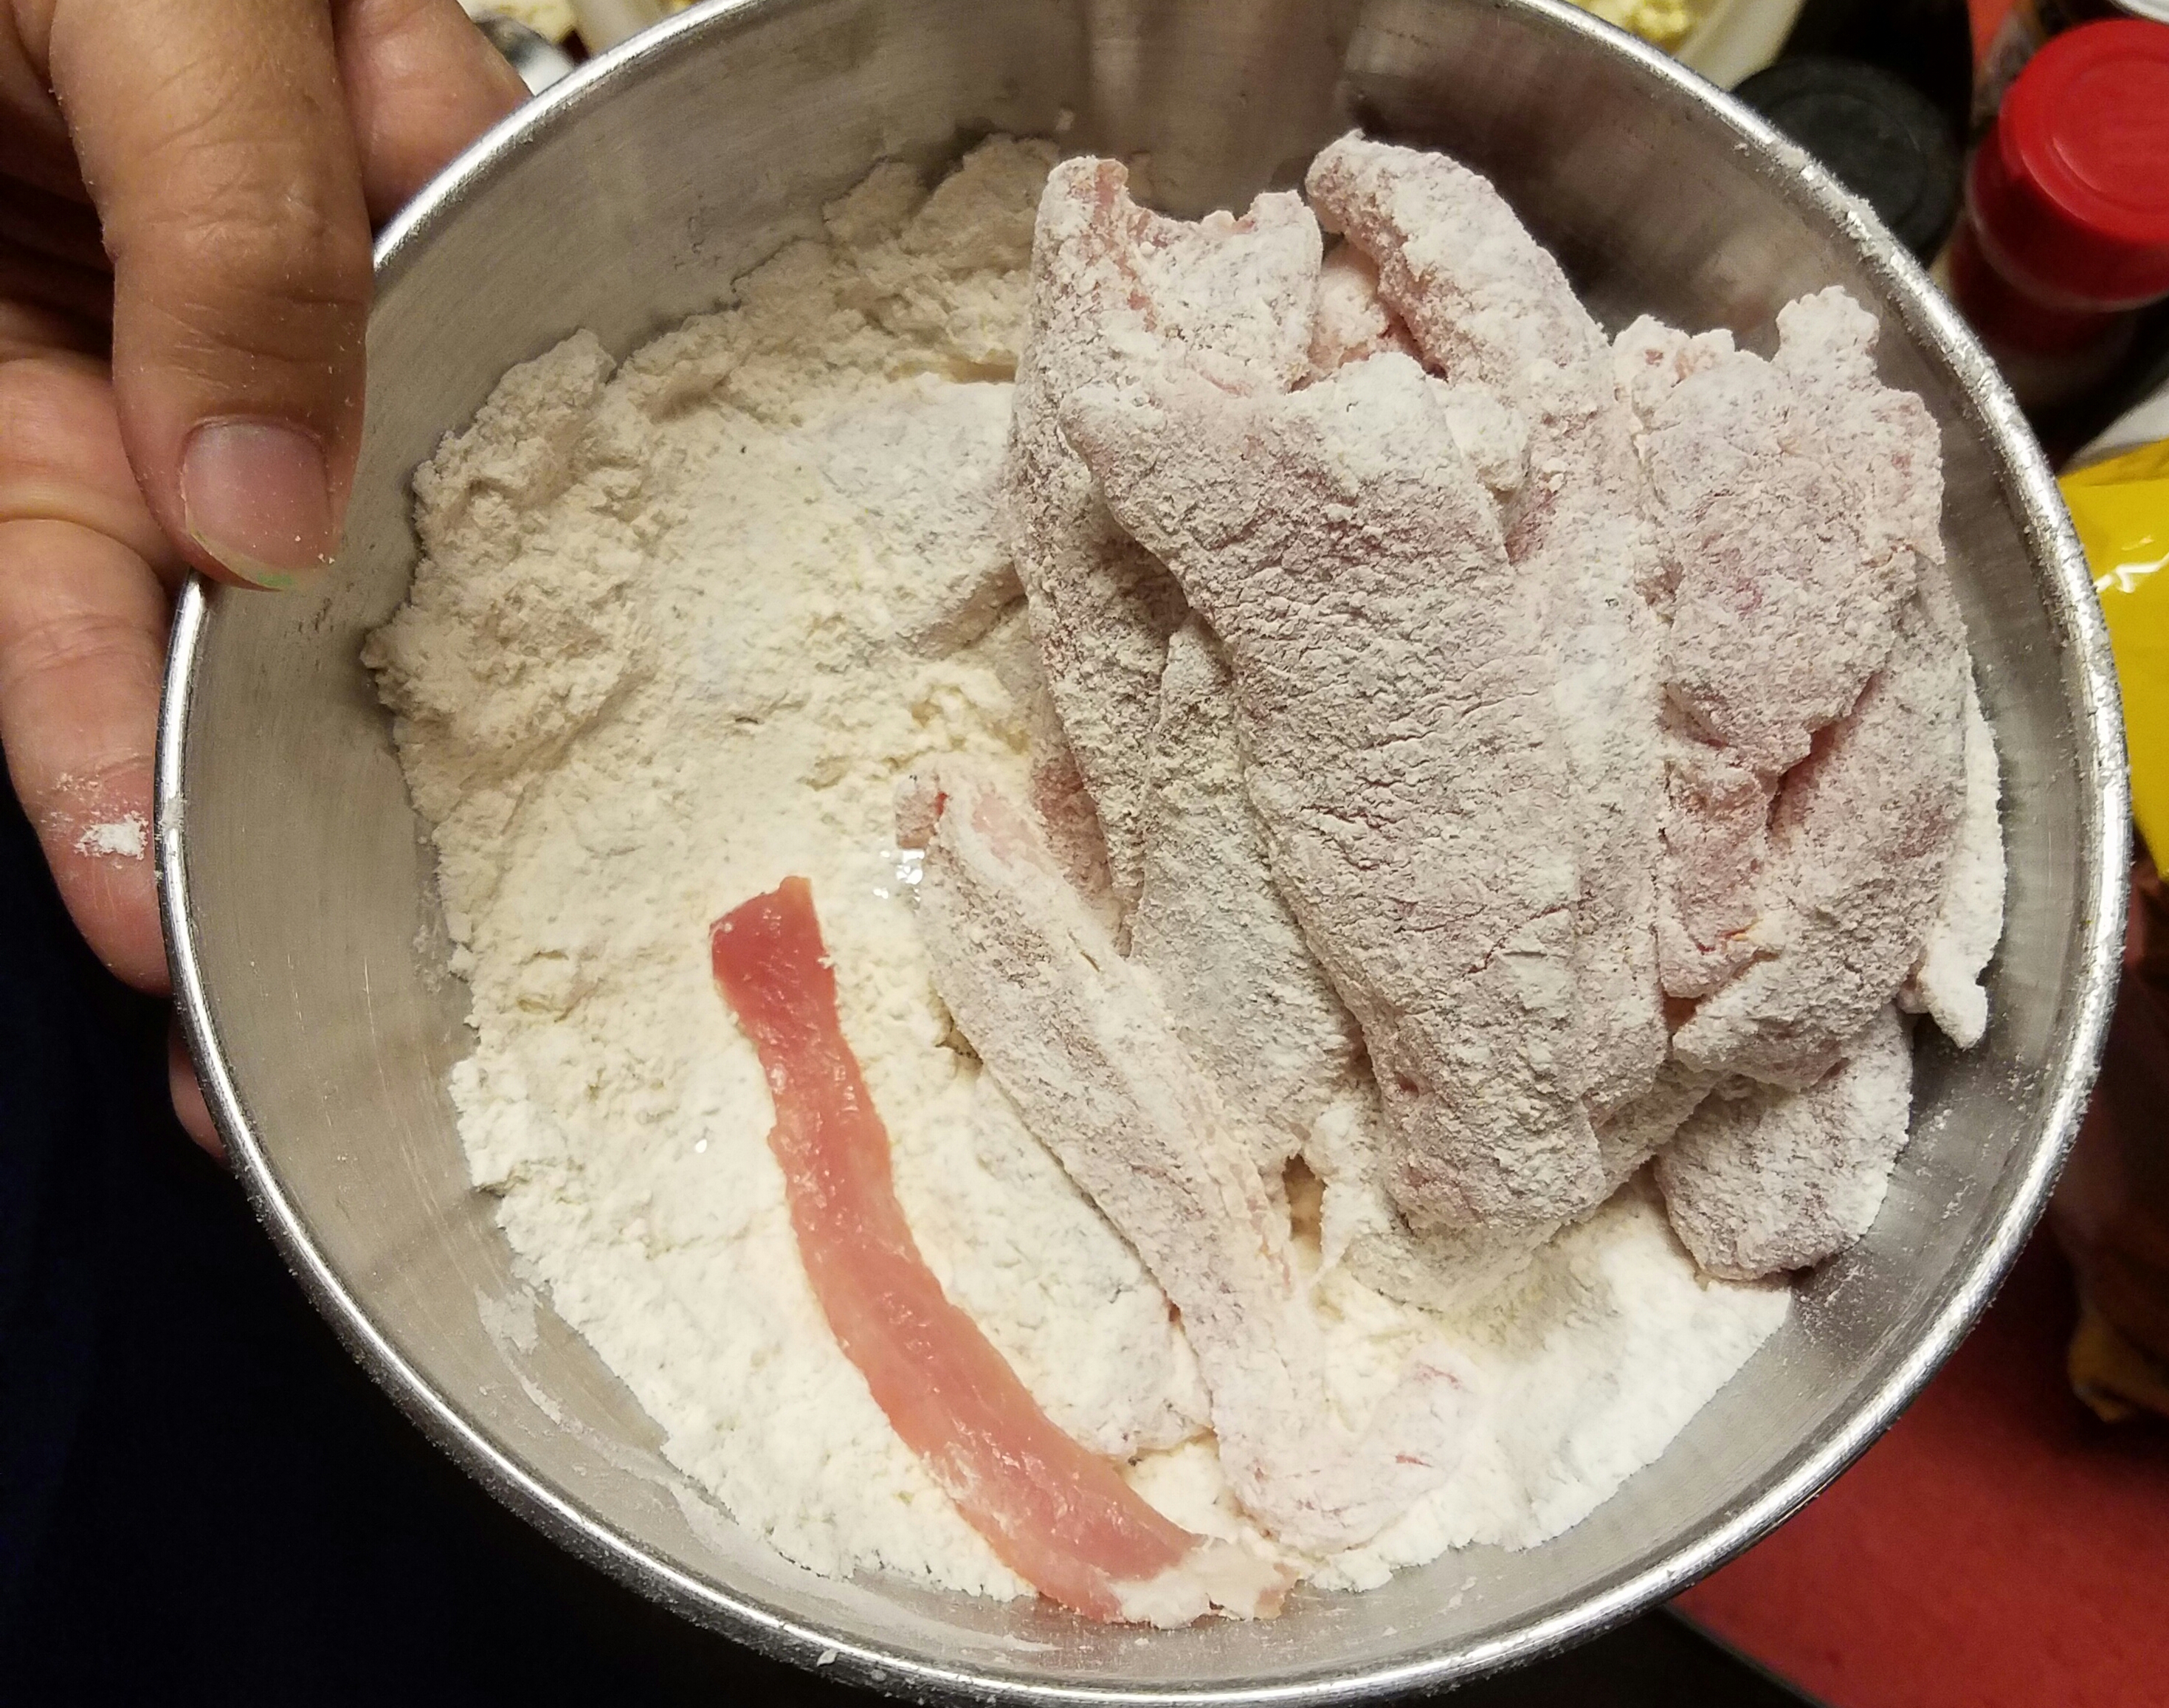
Very thinly slice the pork into strips.
Salt and pepper the pork.
In a pie plate or wide bowl, mix the flour, about a half teaspoon of season salt, a quarter teaspoon salt, and a quarter teaspoon of pepper. Depending on your tastes, you can increase or decrease amounts of seasoning. You can also substitute onion salt or garlic salt in the mix.
In a skillet, heat the oil to medium high temperature.
Take a few of the pork strips and put them into the flour mixture. Toss them until they are well coated. (Note: If you handle the raw meat with you least dominant hand, you can freshly flour small batches just before you fry them, which works much better than flouring them all beforehand. That leaves your ‘clean’ hand for doing things like turning the strips or removing the done pieces onto your platter.)
Test the heat of the oil by placing one of the pork strips into the oil. If it sizzles as you place it in the oil, it is ready to start adding more.
Whole those are cooking, toss the next batch of pork strips in flour. Also make sure your platter is ready to take up the first batch. I suggest paper towel or other to absorb any excess oil.
You will cook the meat about 2 to 3 minutes and then turn them to cook the other side. I typically use metal tongs or a fork to turn the meat. it won’t take long after turning until your strips are fried to a nice golden brown. You will have a good idea that the meat is done once the sizzling for that strip has slowed considerably.
Take up the ones that are done and add the next batch to the skillet. Repeat until all are done!
Don’t let the crunchy bits in the oil go to waste… make gravy! (Instructions to follow on another post!)
If you have solar path lights, this is an almost free way to turn them into decorations at Halloween. I did this a couple of years ago and received a lot of compliments on the effect. The solar light illuminates the bags and they sway with the wind for a nice Halloween effect.
Supplies
white plastic shopping bags
string or rubber bands
any kind of stiff plastic that can be cut into circles for the eyes, preferably black
Start by cutting the plastic shopping bags into long strips about 1-1/2 inch wide.Keep in mind that you are going to fold the strip in half to add to the ghost, so keep the strips long enough for your light height. You can cut the bag side-to-side or top-to-bottom depending on how long you need the strips. Note: you might try to cut your bags to minimize the printing that ends up on the project, but a little won’t hurt the glowing ghost effect.
Once you have your strips, cut the string or get the rubber band and make sure the size will go around your solar light. Start adding the strips of plastic to the string.
Fold the strip in half and place the fold over the string/rubber band.
Pull the tails of the strip through the loop made by the fold of the strip.
Pull until the strip is secure to the string/band, but not super tight. You want to be able to easily slide the strip to make room for more.
Keep adding strips until you have enough to encircle the solar light.
Now cut a circle of stiff plastic that can be added to make the eyes of the ghost. You can use an old soda bottle that you color black with paint or marker (waterproof).
Cut two parallel lines in the center of the circle that you can thread one strip of the plastic through. Slide the eye into position on the strip. You can tie the plastic strip to hold the eye where you want it.
Now place your ghost around the glass part of the solar light so that when night comes, the light will diffuse through the bag giving the ghosts a nice glow. Be sure that you do not cover up your solar cell.
This is a very easy and inexpensive way to add a little Halloween spirit to your lawn.
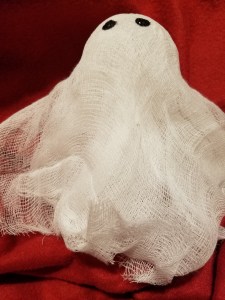
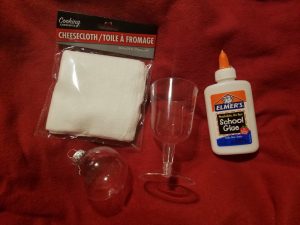
I volunteered to help out with decorations for my son’s first grade Halloween party. I wanted to craft some of these, rather than just buying all pre-made decorations. One idea came to me when I was looking around at my local Dollar Tree. I had originally thought about making some hanging ghosts with styrofoam balls and cheesecloth, but when i saw the battery tea lights, I thought it would be cool if i could have them light up. So this is what i came up with:
Clear plastic Christmas ornament
Clear plastic wineglasses (with detachable base)
Cheesecloth
Battery operated tea lights
Glue (school glue oe similar)
Black paint or markers or other option for ghost eyes
First, I took the hanger off the ornament and the base off the wineglass. Turn the wineglass upside down and then use a little glue to secure the ornament to the wine glass stem.
Cut the cloth into squares and rectangles that will drape the right size over the form. Make sure that the piece you finish with completely covers the form for the ghost. Separate the layers of cheesecloth and drape them smoothly over the form. You want to make sure that you separate the layers because that is going to give volume to the ‘skirt’ section of the ghost.
Put glue on the christmas ornament for what will be the top of the ghost head. Drape the layers over the ball and shape the layers to the top of the ball. Your hands might get a little glue on them at this step. I suggest using School Glue or similar. You can just wash it off when you are done. Plus the school glue will absorb into the cheesecloth helping to maintain the shape.
The ghost takes shape from the layers of cheese cloth.
After you give the glue time to dry, you can add eyes to your ghost. You can glue on circles of black felt, add googly eyes, or use paint or markets to create eyes. Note: the black marker bleeds and doesn’t make sharply defined edges. I liked paint foe the eyes. I did not even use a brush. I used an acrylic paint in a tube. The opening of the tube was just the size i wanted for my eye, so i put the tube opening right on the fabric at the site i wanted the eye and gave a gentle squeeze to leave just a dot of paint on the ghost.
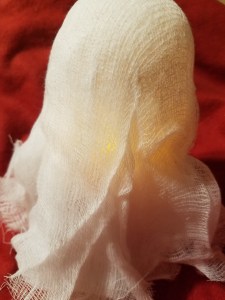
You are almost done! If you want to add eerie flickering light to your ghost, grab some battery operated tea lights. You can place it under the wineglass without securing it, or if you want the light to originate higher in the ghost you can secure it higher in the bell of the glass. I did not want to permanently adhere the tea light, so i used cardboard to make a holder for the tea light.
Lights inside give the ghost an eerie glow!
Place a wineglass you havent yet used to make a ghost (or you can use your ghost bottom) to draw the circumference of the circle onto the cardboard. Then place the tea light into the center of your circle and trace its circumference. You should then have two circles, one inside another one. Cut the circles out. Make sure the ring fits snuggly around the tea light. You can then secure the tea light within the bell of the glass. If you need to remove it to add a new light, it should pull free of the cardboard easily and let you replace when the battery dies.
Cost breakdown:
I purchased all the supplies for this craft at the Dollar Tree with the exception of glue and paint which i had on hand.
3 – Christmas ornaments (2 pack) $3.00
3 – packages of cheesecloth. $3.00
3 – battery tea lights (2 pack) $3.00
1 – plastic disposable wine glasses (6 pack) $1.00
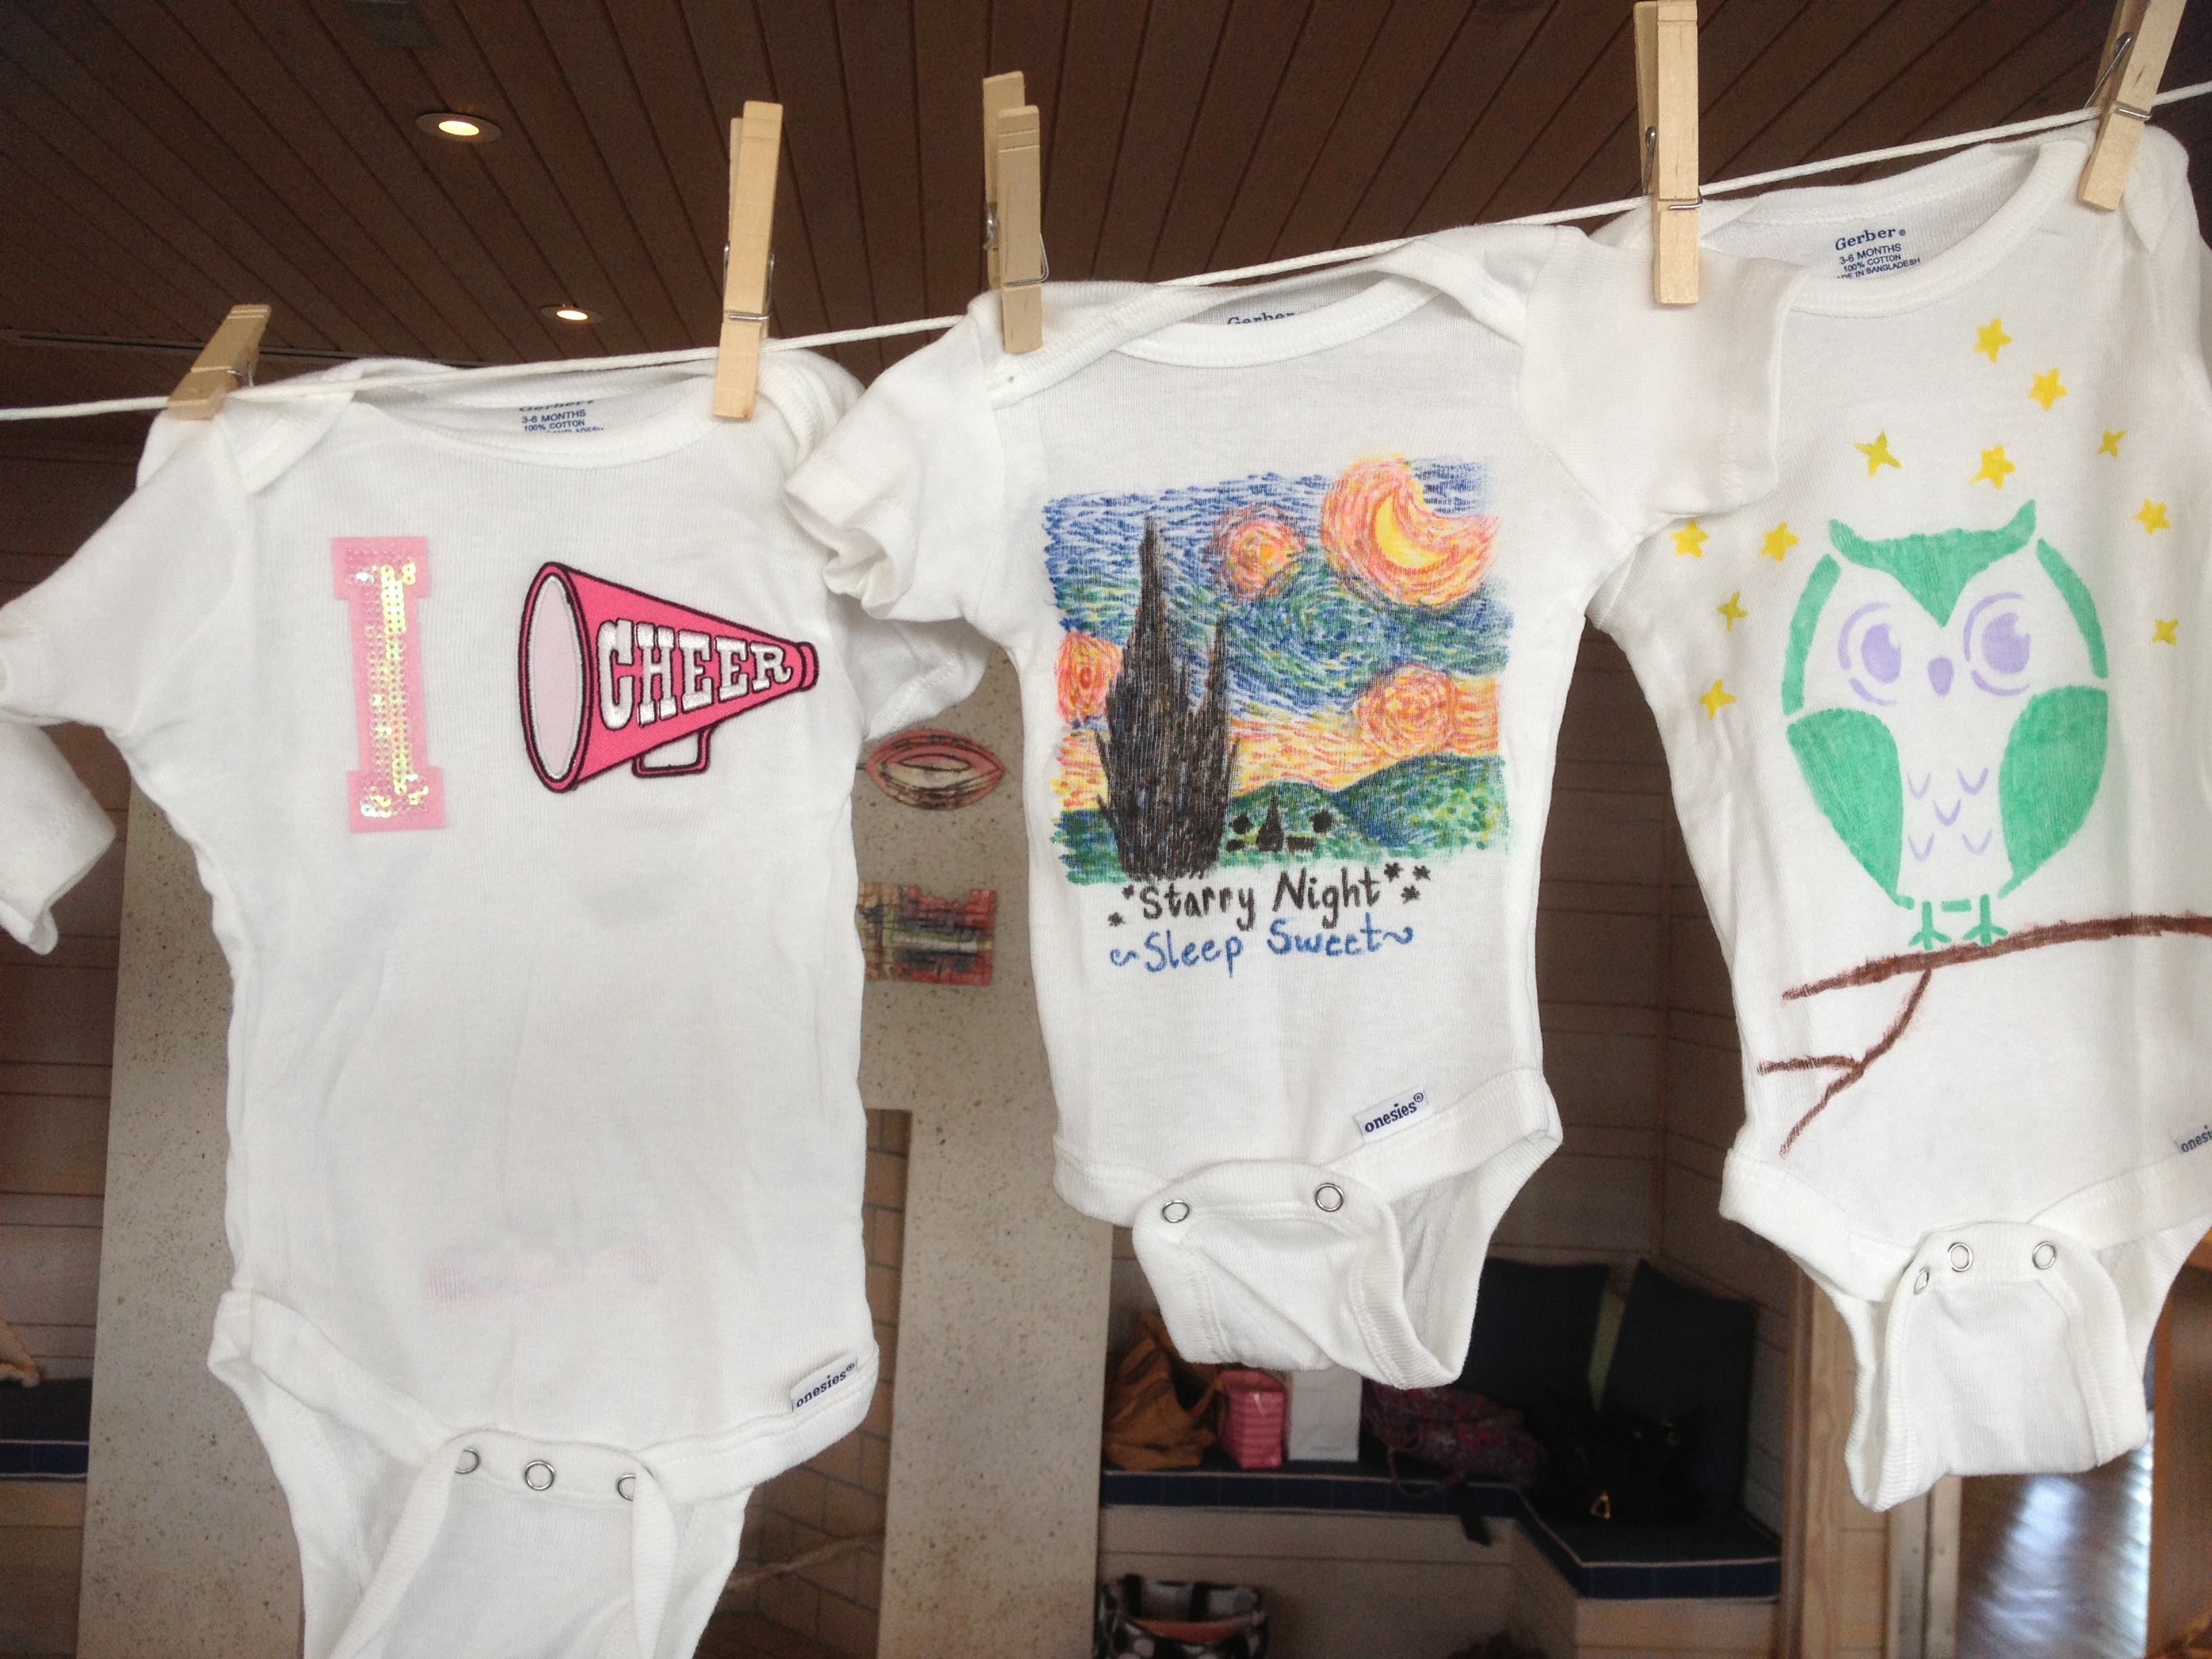
A friend of mine did this at a mutual friend’s baby shower.
Buy a bunch of plain onesies
Bring a variety of patches and paint.
Find some cute stencils and brushes.
Fabric glue for the patches.
And have fun!
This makes a perfect personalized gift for the new mom and it is also a fun activity for the baby shower. This could be a great idea for a second or third baby if the mom doesn’t feel comfortable with a traditional shower. And as a plus, the other children could take part in making a special outfit for their new sibling!